Box to SharePoint: A Practical Path to Centralized Collaboration
Thinking about moving files from Box to SharePoint? This guide explains why many teams make the switch and how to migrate data smoothly while keeping structure, permissions, and productivity intact.
Introduction
Box has long been a familiar name in cloud file sharing, especially for teams that value simple external collaboration and quick access controls. Over time, however, many organizations find themselves operating across multiple Microsoft services — Outlook, Teams, and Office — while their files live elsewhere. This split often creates friction, duplicated workflows, and unnecessary overhead. SharePoint approaches file storage from a different angle. Instead of acting as a standalone repository, it functions as a core part of Microsoft 365, tightly connected to Teams channels, document libraries, and enterprise governance tools. For companies already invested in Microsoft’s ecosystem, consolidating files from Box into SharePoint can simplify collaboration, improve compliance visibility, and reduce long-term management costs. In this article, we’ll explore what motivates teams to migrate from Box to SharePoint, what to consider before starting, and how to complete the transfer efficiently without disrupting daily work.
Box is commonly adopted by organizations that need controlled file sharing across internal teams and external partners. It emphasizes permission management, audit visibility, and secure access, which makes it popular in regulated industries such as legal, finance, and healthcare.
- Enterprise-focused sharing: Fine-grained access controls for users and groups.
- External collaboration: Secure file exchange with clients and vendors.
- File versioning: Track changes and recover earlier revisions.
- Security and compliance: Tools designed to meet corporate governance needs.
- Cross-platform access: Available via web, desktop sync, and mobile apps.
Microsoft SharePoint serves as the document backbone of Microsoft 365. Rather than acting as a simple file repository, it organizes content into sites and document libraries that align with teams, departments, and projects.
- Structured content model: Files live inside sites and libraries.
- Microsoft 365 native: Deep integration with Teams, Outlook, and Office apps.
- Advanced permission layers: Control access at site, library, or file level.
- Change tracking: Built-in version history and activity logs.
- Enterprise governance: Retention, compliance, and auditing features.
While both platforms store files in the cloud, they are designed with different priorities in mind. Box emphasizes secure file sharing and external collaboration, whereas SharePoint focuses on internal teamwork and document lifecycle management.
| Aspect | Box | Microsoft SharePoint |
|---|---|---|
| Primary Role | Secure file sharing and collaboration | Centralized document management |
| Content Structure | Folder-based hierarchy | Sites with document libraries |
| Permissions | User and group-based access | Role-based and policy-driven controls |
| Platform Integration | Works alongside other tools | Core component of Microsoft 365 |
| Typical Use Case | External collaboration and compliance-heavy teams | Departmental and enterprise collaboration |
In practice, Box often feels like a secure exchange layer, while SharePoint acts as a long-term knowledge and document hub. This distinction usually drives migration decisions.
Before moving data from Box to SharePoint, it’s worth planning how your existing folders will map to SharePoint sites and libraries. A direct one-to-one folder copy often works, but larger teams usually benefit from restructuring content around departments or projects.
Permissions deserve special attention. SharePoint enforces access rules at multiple levels, and insufficient rights can interrupt uploads or cause files to appear in unexpected locations. Verifying permissions in advance helps avoid rework.
Data volume also matters. For small collections, manual transfers may be acceptable. For hundreds of gigabytes or more, automated or cloud-based transfer methods are generally faster, more stable, and less dependent on local network conditions.
Method 1: Download from Box and Upload Manually
Step 1: Download Files from Box
Start by logging into the
Box web console.
Browse through your folders and identify the files or directories you plan to move into SharePoint.
Box supports both single-file downloads and multi-selection using
Ctrl (Windows) or Command (macOS).
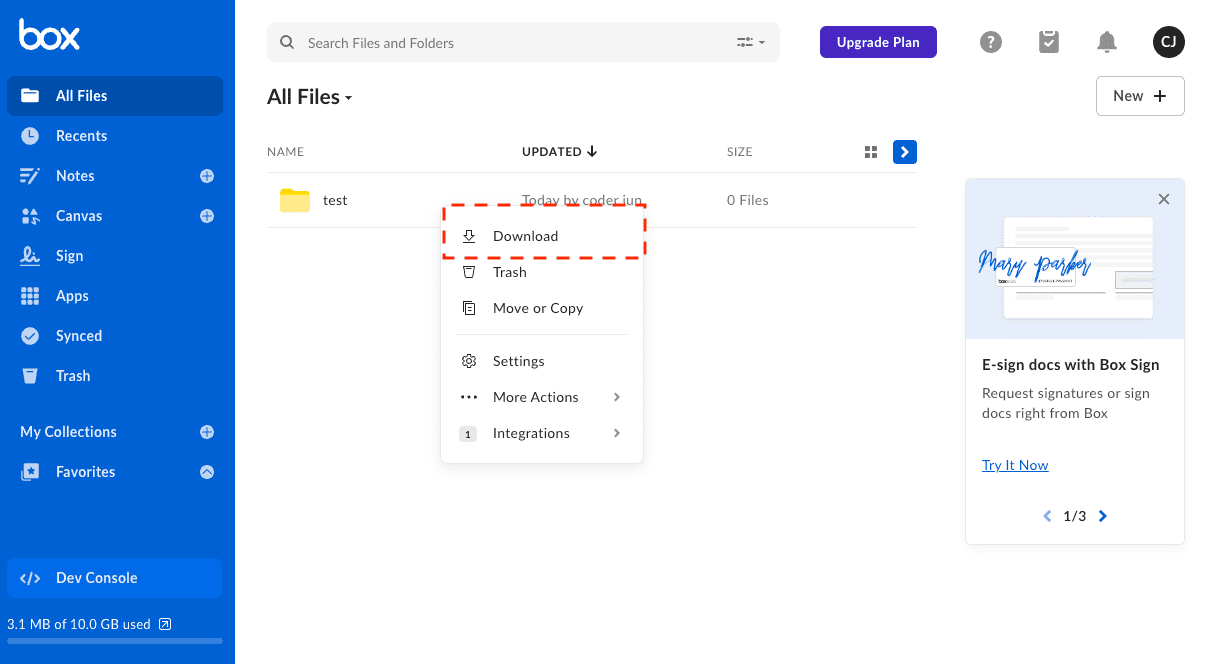
After selecting your items, choose the download option from the top menu or context menu. When folders are selected, Box automatically bundles them into a ZIP archive. Once the download completes, extract the archive locally so the original folder structure is ready for upload.
⬇️ Download files and folders from Box to your local machine
Step 2: Upload Content to SharePoint
Open your target SharePoint site and navigate to the document library where the files should live. From there, you can use the Upload button in the toolbar or simply drag and drop files and folders directly into the browser window.
This step is also a chance to rethink organization. Unlike Box, which relies mainly on folder-based hierarchies, SharePoint organizes content around sites and libraries. Mapping folders to the right team or project library early on can help avoid confusion later.
⬆️ Upload files into the appropriate SharePoint document library
Manual transfers work well for small file sets or occasional moves. However, for large volumes of data, unstable connections, or recurring migrations, downloading and re-uploading quickly becomes inefficient. In those situations, automated or cloud-based transfer methods are usually more reliable.
Method 2: Command-Line Transfer Using Rclone
Step 1: Install Rclone and Configure Box & SharePoint
If you’re comfortable working in a terminal and prefer more control over the transfer process, rclone provides a reliable way to move data directly between cloud services. It supports both Box and Microsoft SharePoint, allowing files to be transferred without routing everything through a browser.
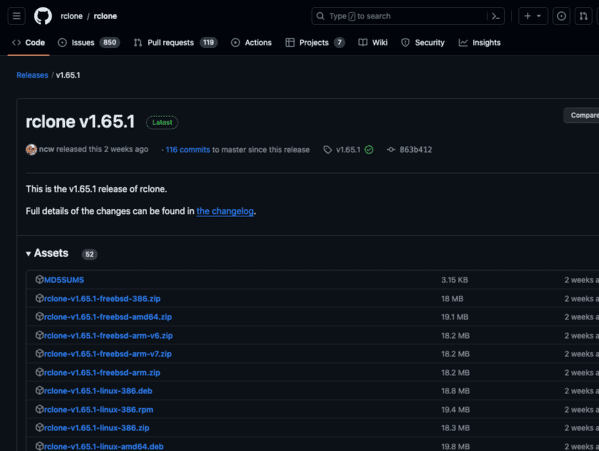
Begin by downloading the latest rclone release from the official website and installing it on
your system. Once installed, open a terminal (or Command Prompt on Windows) and run
rclone config. This interactive setup walks you through creating individual
“remotes,” each representing a cloud service.
-
Box remote:
When asked to choose a storage provider, select
box. Rclone will open a browser window for authentication. After authorizing access, you’ll have a remote (for example,box:) that maps directly to your Box folder hierarchy. -
SharePoint remote:
To connect SharePoint, choose
onedriveas the backend. During setup, rclone will ask which Microsoft storage type you want to use—select SharePoint. After signing in with your Microsoft 365 account, you can pick the target site and the document library that should receive the files.
Step 2: Execute the Transfer
After both remotes are configured, transfers can be triggered using standard rclone commands. For example, to copy a project folder from Box into a SharePoint document library:
rclone copy box:/Projects sharepoint:/SharedDocuments/Projects --progress
This command performs a one-way copy, leaving the source data untouched. If you want the destination to mirror the source over time, a sync operation may be more appropriate:
rclone sync box:/Archives sharepoint:/Archives --progress --exclude "*.tmp"
Before running large transfers or sync jobs, it’s a good idea to include
the --dry-run flag. This allows you to preview exactly what will
change without actually moving or deleting any data.
This method is well suited for technical users who need repeatable workflows, automation, or scheduled jobs. Rclone supports filters, bandwidth throttling, and unattended execution via cron or Windows Task Scheduler. The main downside is setup complexity—especially when selecting the correct SharePoint site and library—but once configured, it becomes a dependable long-term migration tool.
Method 3: Cloud-to-Cloud Transfer with CloudsLinker
Overview: Move Files from Box to SharePoint Online
CloudsLinker is built for situations where you want the transfer to happen entirely in the cloud. Files are copied directly from Box to Microsoft SharePoint without passing through your local computer. Once a task starts, it continues running even if you close the browser or power off your device.
Step 1: Add Box as the Source
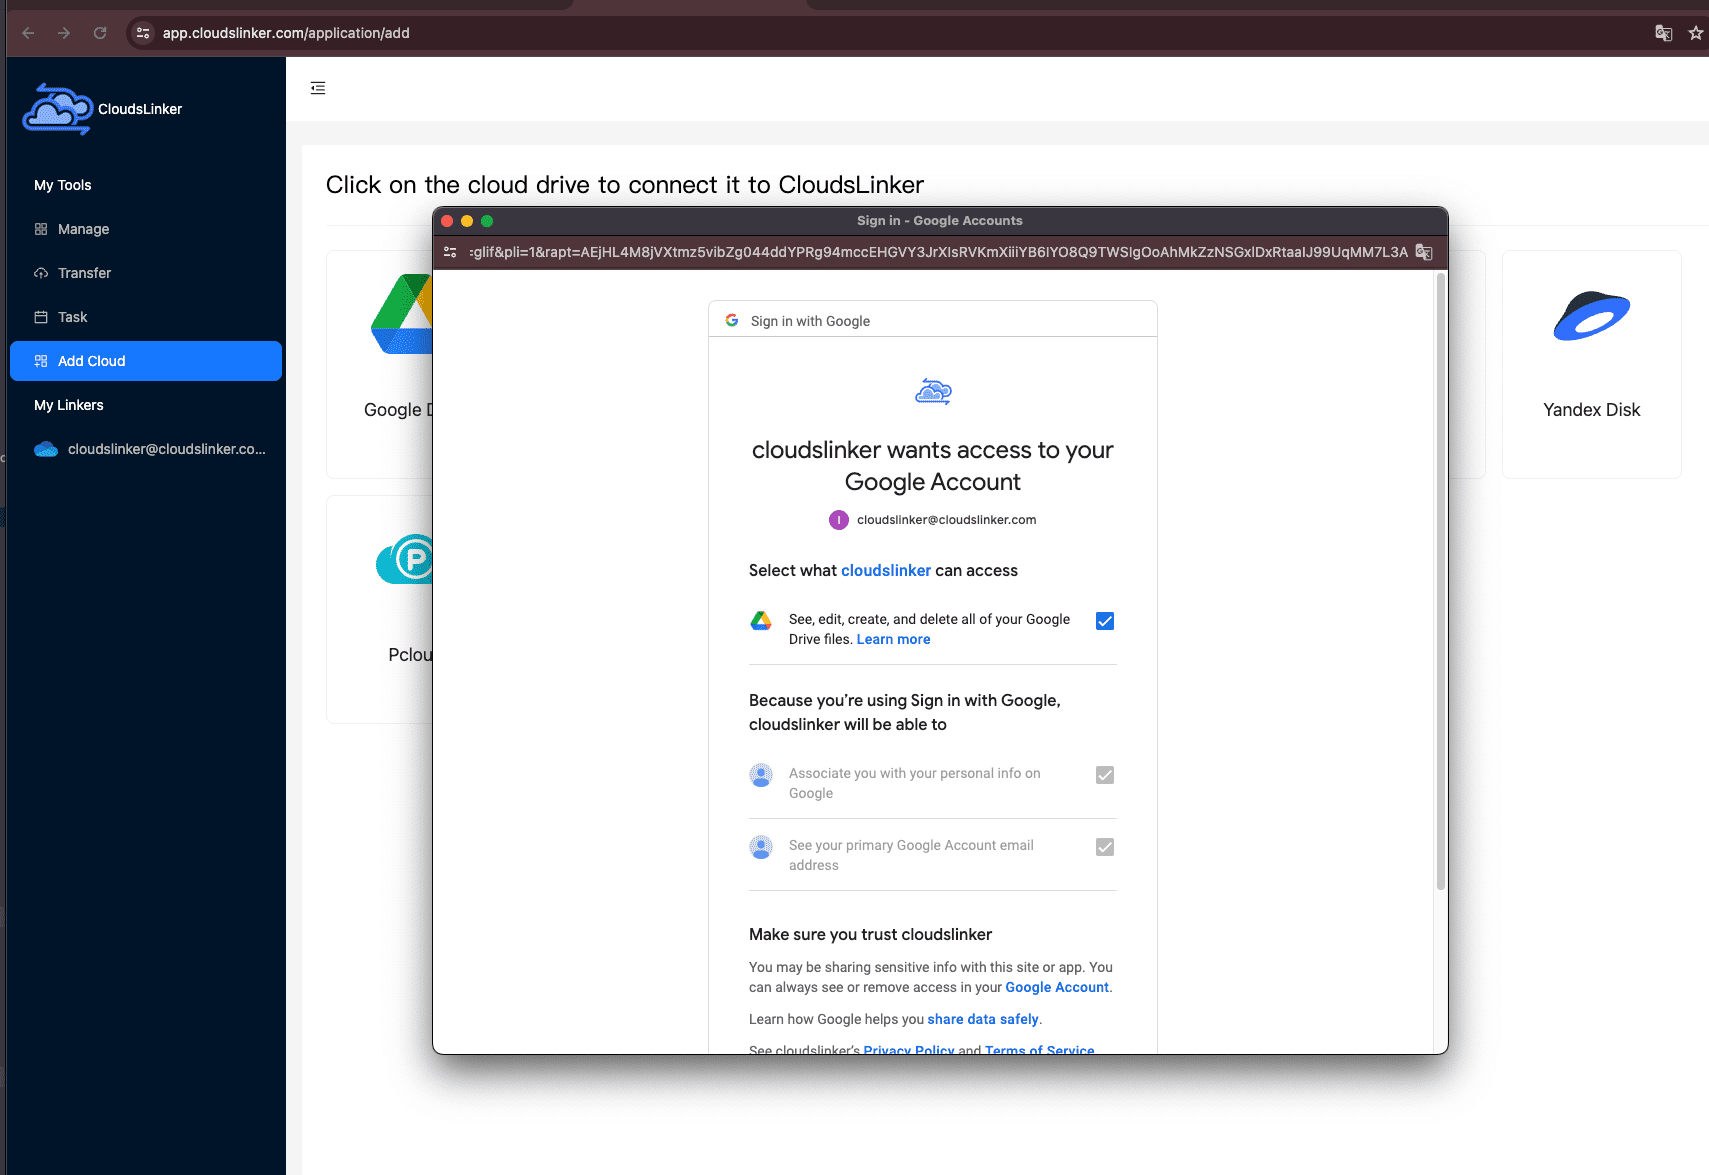
Sign in to app.cloudslinker.com and open your dashboard. Click Add Cloud, then choose Box from the supported cloud list.
CloudsLinker will open a secure OAuth 2 authorization page hosted by Box. Complete the authorization in your browser to grant access. After confirmation, your Box account appears in the cloud list and can be selected as the source for migration.
Step 2: Connect SharePoint as the Destination
Next, add Microsoft SharePoint as the destination cloud. Sign in with your Microsoft 365 account and approve access. You’ll be asked to select the SharePoint site that should receive the files.
If the site contains multiple document libraries, you can choose the exact library in advance. This ensures files are delivered to the correct team, department, or project workspace.

Step 3: Select Data and Define the Target Folder
Open the Transfer page. In the left panel, select your connected Box account and browse to the folders or files you want to migrate. In the right panel, choose SharePoint and specify the destination folder.
This is where you can control how Box folders map into SharePoint’s document libraries. If restructuring is needed during migration, adjusting the destination path here helps keep things organized from day one.

Step 4: Start the Transfer and Track Progress
Launch the task and monitor progress from the task panel. CloudsLinker shows real-time status updates, transferred file counts, and any errors encountered during the process. Transfers can be paused and resumed when needed.
Once finished, a summary report highlights completed files and any skipped items. Your data will then be available in SharePoint, ready for team collaboration and ongoing access.
For large migrations, shared team folders, or business-critical content, this method removes most manual effort. CloudsLinker handles everything online, without relying on local storage, browser uploads, or long-running desktop sessions.
Need to Transfer Between Other Cloud Platforms?
Beyond SharePoint, CloudsLinker supports data transfers across many services including OneDrive, Box, WebDAV, MEGA, and more — all executed directly in the cloud without keeping your computer online.
Comparing Three Ways to Move Files from Box to SharePoint
When preparing a migration from Box to Microsoft SharePoint, there is rarely a single “correct” method. The right choice depends on practical factors such as data size, time constraints, comfort with technical tools, and whether the transfer needs to run without supervision. The table below outlines how the three most common approaches compare in real-world use.
| Approach | Learning Curve | Transfer Performance | Best Fit Scenarios | Depends on Local Network | Technical Skill |
|---|---|---|---|---|---|
| Manual Download & Upload | Very Low | Moderate | Small folders or one-time transfers | Yes | Beginner |
| Rclone (Command-Line) | Medium | High | Automated or repeatable migrations | Yes | Advanced |
| CloudsLinker (Cloud-to-Cloud) | Low | High | Large datasets or unattended transfers | No | Beginner |
For small collections of files, manual download and upload is often sufficient. It requires no setup and works well when speed and simplicity matter more than efficiency. Rclone becomes appealing when transfers need to be repeatable, filtered, or scheduled, but it assumes familiarity with command-line tools and a stable local environment.
When the goal is to migrate large Box accounts or allow the transfer to continue without keeping a computer online, a cloud-based option such as CloudsLinker is often the most practical choice. Data moves directly between Box and SharePoint online, avoiding local bandwidth limits and browser timeouts.
Migrating content from Box into Microsoft SharePoint is usually straightforward, but a small amount of preparation can prevent delays—especially when shared folders, permissions, or large volumes of data are involved.
- Verify Access to All Box Content: Make sure you have full access to every folder you plan to migrate. Files owned by other users or shared externally may require additional authorization.
- Plan the SharePoint Structure First: SharePoint organizes content by sites and document libraries rather than a flat folder tree. Designing this structure in advance reduces the need for reorganization later.
- Decide Where the Transfer Should Run: Manual uploads and rclone jobs rely on your local computer and network. For long-running or unstable connections, a cloud-based option like CloudsLinker allows the transfer to run entirely online.
- Review File Names and Path Lengths: Although SharePoint supports large files, extremely long paths or unsupported characters can still cause upload failures.
- Confirm SharePoint Permissions: Ensure your Microsoft 365 account has upload rights to the correct site and document library. Permission issues are one of the most common causes of migration errors.
- Think Beyond a One-Time Move: If ongoing transfers are likely, features such as retry handling, progress tracking, and unattended execution become increasingly important.
Spending a little time planning usually makes the difference between a smooth migration and a frustrating one. Understanding how SharePoint manages content—and choosing a method that fits your workflow—helps ensure a clean transition from Box.
Box to SharePoint Migration FAQ
Conclusion
Moving files from Box to SharePoint isn’t just about changing storage locations — it’s about aligning documents with how your organization actually works. By bringing files closer to Microsoft 365 apps, SharePoint helps teams collaborate in context, manage access more consistently, and apply retention or compliance policies with greater confidence. With [Cloudslinker](https://www.cloudslinker.com), the migration process avoids many of the usual headaches. Files are transferred directly between Box and SharePoint in the cloud, preserving folder structures while eliminating the need for local downloads, uploads, or keeping a workstation running for hours or days. For teams looking to streamline collaboration and reduce tool sprawl, migrating from Box to SharePoint using Cloudslinker offers a controlled, low-friction way forward. It’s a practical step toward a more unified and manageable document environment.
Online Storage Services Supported by CloudsLinker
Transfer data between over 48 cloud services with CloudsLinker

OneDrive

Google Drive

Google Photos

Shared Drive

OneDrive for Business

Dropbox

Box

Mega

pCloud

Yandex

ProtonDrive

AWS

GCS

iDrive

Storj

DigitalOcean

Wasabi

1fichier

PikPak

TeleBox

OpenDrive

Backblaze B2

Fastmail file

SharePoint

Nextcloud

ownCloud

Premiumize me

HiDrive

Put.io

Sugar Sync

Jottacloud

Seafile

Ftp

SFtp

NAS

WebDav

4shared

Icedrive

Cloudflare R2

Scaleway

Doi

iCloud Drive

iCloud Photos

FileLU

Zoho WorkDrive

Telia Cloud / Sky

Drime

Filen
Didn' t find your cloud service? Be free to contact: [email protected]
Further Reading
Effortless FTP connect to google drive: Transfer Files in 3 Easy Ways
Learn More >
Google Photos to OneDrive: 3 Innovative Transfer Strategies
Learn More >
Google Photos to Proton Drive: 3 Effective Transfer Techniques
Learn More >