How to Transfer Photos from Google Photos to iCloud Drive: 4 Updated Methods (2025)
Want to move your pictures from Google Photos into iCloud Drive? In this 2025 guide, we walk through four practical approaches—from Apple’s built-in options to third-party cloud migration services—so you can keep your memories safe inside the Apple ecosystem.
Introduction
For many of us, Google Photos has been the default home for pictures and videos. But as more people commit to the Apple ecosystem, shifting those memories into iCloud Drive makes sense—especially if you’re already using iPhone, iPad, or Mac daily. The good news: you don’t need to lose sleep over it. There are several straightforward ways to complete the transfer, whether you prefer manual downloading or a fully automated cloud-to-cloud bridge.
Google Photos is Google’s popular cloud platform for storing pictures and videos. Launched in 2015, it has become the default backup option for millions of Android and web users, offering automatic sync and smart search tools.
- Automatic backup: Photos and videos from your phone or desktop are stored in the cloud.
- Smart features: AI-powered search, facial recognition, and automatic album creation.
- Cross-device access: Available on Android, iOS, and browsers.
- Storage policy: As of June 2021, uploads count toward your Google account’s storage quota.
- Export support: Google provides Takeout for full data exports.
iCloud Drive is Apple’s integrated storage system that syncs seamlessly with iPhone, iPad, and Mac. It provides users with a central hub for documents, photos, and files that stay consistent across all Apple devices.
- 5 GB free storage: Every Apple ID starts with free space, expandable to 12 TB via iCloud+.
- Photo integration: Works smoothly with the Photos app and the iOS Files app.
- Handles large files: Individual uploads can be as large as 50 GB.
- Universal access: Use Finder on Mac, Windows integration, or the iCloud.com portal.
- Privacy first: Supports end-to-end encryption and Advanced Data Protection.
For nearly a decade, millions of users have trusted
Google Photos to back up their memories. It’s a powerful service with smart
search,
automatic sync, and AI-driven organization. But if you’ve moved deeper into the Apple
ecosystem,
keeping photos split across platforms can quickly become inconvenient.
By shifting your images into
iCloud Drive, you gain tighter integration with iPhone, iPad, and Mac. Your
files
are always at hand—no switching apps or juggling accounts. Migrating also means fewer
worries
about syncing, stronger privacy controls, and easier sharing with other Apple users.
- Deep Integration: Photos moved into iCloud Drive can be accessed directly through Finder or the iOS Files app.
- One Ecosystem: Whether you snap a picture on iPhone or save edits on Mac, everything stays synced without extra steps.
- Better Privacy: Apple includes end-to-end encryption, plus optional Advanced Data Protection for those who want maximum security.
- Handles Large Files: Uploads up to 50 GB per file make iCloud a good fit for 4K videos, RAW images, or creative projects.
- Sharing Made Easy: Invite family or teammates to shared folders and co-edit documents without third-party tools.
- Scalable Plans: Start with 5 GB free, and expand all the way to 12 TB on iCloud+ if you need professional-level storage.
If your photos are scattered in Google Photos, moving them to iCloud Drive can reduce app-hopping, improve security, and keep your workflow consistent with the Apple devices you already use every day.
While both platforms store your pictures in the cloud, Google Photos is optimized for AI-powered organization and cross-platform access. iCloud Drive, on the other hand, fits seamlessly into Apple’s environment, making it the natural choice for iPhone, iPad, and Mac users. Here’s a side-by-side look:
| Feature | Google Photos | iCloud Drive |
|---|---|---|
| Free Storage | 15 GB shared across Google services | 5 GB free per Apple ID |
| Platform Integration | Works across Android, web, and iOS apps | Built into iOS, iPadOS, macOS; accessible via iCloud for Windows |
| Organization | AI-powered grouping, face recognition, and smart search | Folder-based structure inside Finder or Files app |
| File Size Limit | Uploads capped at 200 MB per photo or 10 GB per video | Up to 50 GB per individual file |
| Collaboration | Album sharing and commenting | Shared folders, real-time co-editing in Apple productivity apps |
| Security | Standard encryption; account-level security via Google account | End-to-end encryption with optional Advanced Data Protection |
Both services are excellent, but their focus is different. Google Photos shines when it comes to organizing and discovering pictures across multiple platforms. iCloud Drive is better if your daily workflow is tied to Apple hardware. And with tools like CloudsLinker, you can transfer your photo collections directly from Google Photos into iCloud without consuming your own bandwidth.
Before starting the migration, it’s a good idea to review how much data is stored inside your Google Photos account. Since June 2021, Google counts photos and videos toward your Google storage quota, which includes Gmail and Google Drive as well. This means you might be sitting on far more data than you expect. Compare that with the iCloud+ storage tiers you plan to use—remember, iCloud Drive only comes with 5 GB free by default, and most users will need to upgrade if they are moving large photo archives or video collections.
Next, make sure your Apple ID is active and iCloud Drive is switched on across all your devices. On iPhone or iPad: Settings → [Your Name] → iCloud → iCloud Drive. On macOS: System Settings → Apple ID → iCloud. Confirming these settings ensures that once your photos are uploaded, they’ll appear automatically in Finder or the iOS Files app.
This stage is also perfect for a little housekeeping: delete duplicates, clean up outdated albums, and check whether your file names are consistent. Once ready, decide which transfer method fits best. A manual approach could mean downloading albums via Google Photos’ web interface and then uploading them into iCloud. For those comfortable with scripts, Rclone offers command-line automation. And if you’d prefer to avoid using local bandwidth altogether, a cloud-to-cloud solution like CloudsLinker can directly connect Google Photos to iCloud Drive and run transfers in the background. Spending a few minutes preparing now will save you hours of frustration once the migration starts.
Method 1: Move Photos Using Your Web Browser
Step 1: Download from Google Photos
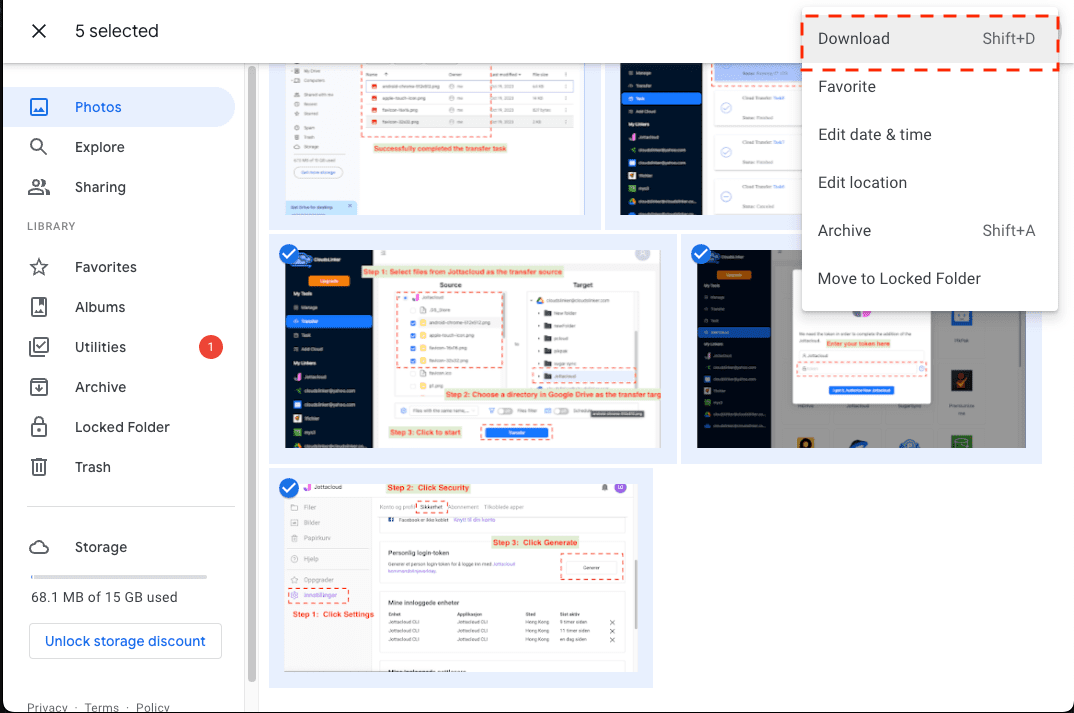
The most straightforward way to begin is by logging into Google Photos through your browser. Once signed in, navigate to the albums or individual pictures you’d like to move. Select them and click the Download option from the menu. Google will typically compress your selection into a ZIP file, which you’ll then need to extract on your computer to prepare for upload.
Keep in mind that Google Photos has certain export limitations—for example, downloads may split into multiple archives if your library is large. If you want a full backup of your entire account, you may want to use Google Takeout instead, which we’ll cover later.

Step 2: Upload to iCloud Drive
After extracting your photos locally, head over to iCloud.com and sign in with your Apple ID. If iCloud Drive hasn’t been activated yet, make sure it’s turned on in your Apple ID settings. From there, simply drag-and-drop your folders or use the Upload button to send your files into iCloud Drive.
You can choose to recreate your Google Photos folder structure inside iCloud, or reorganize albums for a fresh start. Once uploaded, your pictures will sync across all your Apple devices automatically, making them accessible in Finder, the Files app, or iCloud.com whenever you need them.
This browser-based method is ideal if you’re only moving a few albums or want a one-time transfer. For heavier workloads or repeat migrations, command-line tools like Rclone can automate the process. Alternatively, if you’d rather avoid downloading to your computer altogether, cloud-to-cloud platforms such as CloudsLinker can transfer photos directly from Google Photos to iCloud Drive in the background—saving both time and bandwidth.
Method 2: Export with Google Takeout
Step 1: Create an Export from Google Photos
If you want a full copy of your Google Photos library, the most reliable option is
Google Takeout.
Sign in with your Google account, scroll down to Google Photos, and select the albums
or
the entire library you want to move.
You can also choose the export format—Google usually delivers photos as
.zip archives, and metadata is included in .json files.
For large collections, exports may be split into multiple parts (typically 2 GB or 4 GB chunks by default). If you have a big photo library, consider adjusting the export size limit to reduce the number of files you’ll need to handle later. Google will prepare the archive and send you a download link by email, which may take several hours or even days depending on your library size.

Step 2: Import the Export into iCloud Drive
Once your export is ready, download and extract the archives on your computer. You’ll find your photos organized by album or date, depending on your Takeout settings. After extracting, open iCloud.com or use Finder on a Mac, and drag the folders into iCloud Drive. This will upload your exported albums and keep them synced across iPhone, iPad, and Mac.
If you’d like to maintain the same album organization, consider creating matching folders inside iCloud Drive before uploading. That way, your structure stays consistent and easy to navigate later.
Using Google Takeout is perfect if you want a complete backup of your Google Photos library before switching to iCloud. However, downloading and re-uploading can be time-consuming, especially with hundreds of gigabytes of media. If you’d prefer a direct transfer without using your local bandwidth, a cloud-to-cloud service like CloudsLinker can connect your Google Photos and iCloud accounts and handle the migration automatically in the background.
Method 3: Use Rclone from the Command Line
Step 1: Install Rclone and Set Up Your Remotes
For users comfortable with the terminal, Rclone is one of the most powerful ways to transfer data between cloud platforms. It supports both Google Photos and iCloud Drive, making it a flexible choice if you want automation and full control over your migration.
Start by downloading the latest release from the
official Rclone
downloads page.
Once installed, open your terminal (or Command Prompt on Windows) and run:
rclone config. This launches the configuration wizard.
-
Google Photos Remote: Choose
google photosas the backend. You’ll authenticate with your Google account and grant Rclone permission to read your photos. The full setup is explained in the Google Photos backend guide. -
iCloud Remote: Select
icloudfor the second remote. For security, Apple requires you to generate an app-specific password. Follow the Rclone iCloud guide for details. -
macOS Local Option: If you already have iCloud Drive syncing on your Mac, you can
point
directly to
~/Library/Mobile Documents/com~apple~CloudDocsinstead of configuring a remote.
Step 2: Copy or Sync Your Photos
Once your remotes are set up, you can begin transferring files. Here are a couple of examples:
rclone copy "gphotos:album/Family" icloud:/FamilyPhotos --progressrclone sync gphotos: icloud:/AllPhotos --progress --exclude "*.json"
The first command copies everything from your Google Photos album Family into a matching
folder
in iCloud Drive.
The second command synchronizes your entire Google Photos library into iCloud, while skipping the
.json metadata files that Takeout often generates.
You can test the command with --dry-run before committing to a full transfer.
Advanced users value Rclone because it allows precise filtering, bandwidth limits, and scheduling with cron (Linux/macOS) or Task Scheduler (Windows). The iCloud setup can take a bit of effort initially, but once configured it’s highly reliable. If you’d prefer to skip the command line, a cloud-to-cloud platform like CloudsLinker can directly connect Google Photos and iCloud Drive, handling the transfer online without using your own device’s bandwidth.
Method 4: Cloud-to-Cloud Migration with CloudsLinker
Overview: Move Photos Without Using Local Bandwidth
CloudsLinker allows you to transfer photos directly from Google Photos into iCloud Drive without first downloading them to your computer. Since the transfer is handled entirely in the cloud, your local internet speed won’t slow things down—and you can even close your browser while the task continues running in the background. CloudsLinker already supports 40+ storage platforms, making it one of the most versatile migration tools available.
Step 1: Sign in to CloudsLinker
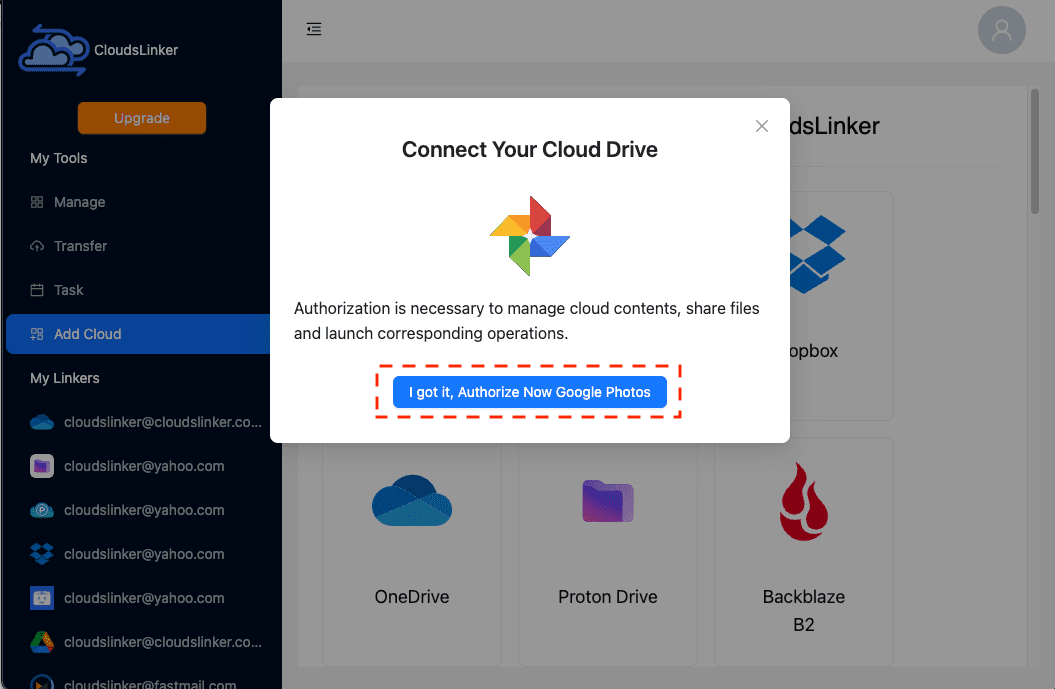
Visit www.cloudslinker.com and log in with your account (or sign up for free). From the dashboard, click “Add Cloud” and choose Google Photos. Because of Google’s updated API rules, you will be redirected to Google Photos in a new window where you must manually select the photos and albums you want to transfer. Once you’ve finished choosing, click Done and return to CloudsLinker—your selected items will now be ready for migration.


After confirmation, Google Photos will appear in your dashboard as a connected source.
Step 2: Connect iCloud Drive
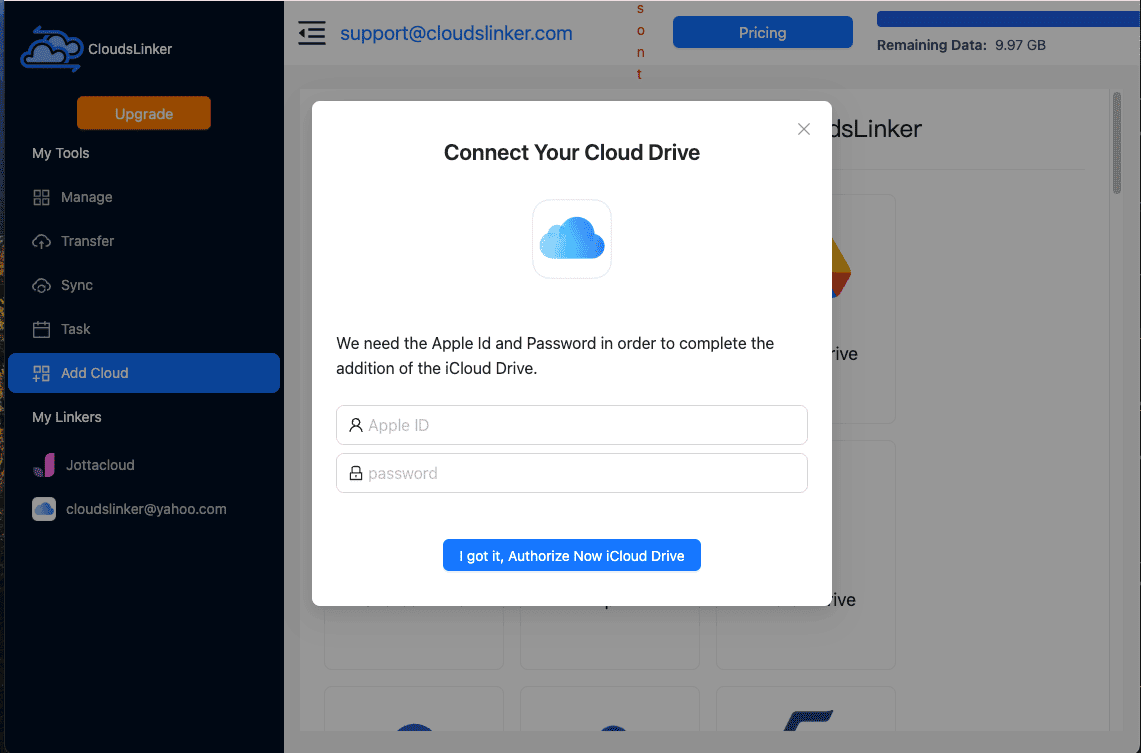
Next, add iCloud Drive as the destination. Sign in using your Apple ID credentials, and if two-factor authentication is enabled, enter the verification code sent to your Apple device. Once approved, iCloud Drive will appear alongside Google Photos in your CloudsLinker panel.

Step 3: Set Up the Transfer
Open the Transfer tab. On the left, choose Google Photos and select the albums or photos you previously marked. On the right, select iCloud Drive as your destination, and create or pick a folder where the files will be stored. Once ready, click Start Transfer.

CloudsLinker also gives you the option to filter by file type, skip duplicates, or schedule transfers for off-peak hours. This is especially useful if you’re moving a large collection of videos alongside your photos.
Step 4: Monitor Progress
Every transfer you launch will appear in the Task List. You can pause, resume, or check progress at any time, and once the process finishes, CloudsLinker will provide a report showing which files were successfully migrated. At this stage, your photos will be accessible in iCloud Drive across your iPhone, iPad, and Mac.
Tip: Want to Skip Manual Selection?
Because of Google’s latest API restrictions, you currently need to select your photos inside Google Photos during setup. If you’d rather avoid that, you can use Google Takeout to export everything at once, then upload the exported files into iCloud Drive via Finder, iCloud.com, or CloudsLinker’s bulk upload option.
Comparing the 4 Ways to Transfer from Google Photos to iCloud Drive
There isn’t a single “best” method for moving your pictures out of Google Photos and into iCloud Drive. The right approach depends on how much content you have, how often you plan to run transfers, and whether you’re comfortable with advanced tools. Here’s a side-by-side look at the four most common options:
| Method | Ease of Use | Speed | Best For | Uses Local Bandwidth | Skill Level |
|---|---|---|---|---|---|
| Web Browser (Manual Download/Upload) | ★★★★★ | ★★★☆☆ | Small albums or one-off transfers | Yes | Beginner |
| Google Takeout Export | ★★★★☆ | ★★★☆☆ | Full backups of entire photo libraries | Yes | Beginner / Intermediate |
| Rclone (Command Line) | ★★☆☆☆ | ★★★★★ | Advanced users who want automation | Yes / No (depends on setup) | Advanced |
| CloudsLinker (Cloud-Based) | ★★★★★ | ★★★★★ | Large migrations, recurring transfers, minimal manual effort | No | Beginner |
If you just need to move a few albums, the browser download-and-upload method is the easiest way to go. For those who want a complete copy of their library including metadata, Google Takeout is the official solution. More technical users may prefer Rclone, which enables scheduled syncs and powerful filtering. And if you’d rather skip downloads entirely, CloudsLinker provides a direct Google Photos → iCloud pipeline, saving both time and bandwidth.
Moving your photo library from Google Photos to iCloud Drive is usually straightforward, but preparing ahead of time can save headaches—especially if your collection is large. Here are some practical points to keep in mind:
- Understand Export Limits: Google Photos exports through Takeout are split into chunks (2–4 GB by default). Be ready to download and reassemble multiple files if your library is big.
- iCloud File Size Limit: iCloud Drive supports uploads up to 50 GB per file. Large 4K or RAW videos may need to be split before uploading.
- Bandwidth Awareness: Manual download–upload methods consume your internet connection. If your connection is slow, consider a cloud-to-cloud service like CloudsLinker.
- Check Your iCloud Storage Plan: Every Apple ID comes with only 5 GB free. Upgrade to an iCloud+ plan if you’re migrating tens or hundreds of gigabytes.
- Security Considerations: Both Google Photos and iCloud use strong encryption, but always enable two-factor authentication on your Apple ID for maximum safety.
- Plan for Large Jobs: Cloud-based tools like CloudsLinker can resume failed jobs, schedule transfers, and avoid the risk of browser sessions timing out.
With these tips in mind, moving from Google Photos to iCloud Drive becomes a smooth process. Whether you’re transferring a handful of albums or your entire photo library, the key is to plan ahead, know the limits of each platform, and pick the workflow that matches your comfort level.
Frequently Asked Questions
.json files.
iCloud Drive doesn’t automatically rebuild Google’s album structure, so you may want to recreate
folders manually for easier navigation.
Watch Our Step-by-Step Video Guide
Prefer watching instead of reading? In this walkthrough, we’ll demonstrate how to transfer photos from Google Photos into iCloud Drive. The video covers browser downloads, Google Takeout exports, Rclone automation, and direct cloud-to-cloud transfers with CloudsLinker. Whether you’re handling a small album or a full photo archive, you’ll learn the pros and cons of each method and how to avoid common pitfalls.
Conclusion
Moving from Google Photos to iCloud Drive may sound intimidating, but it doesn’t have to be. If you only need a few albums, Apple’s native tools are perfectly fine. For larger archives, command-line utilities such as Rclone can save time, while cloud-based transfer services like CloudsLinker let you bypass local bandwidth altogether. Choose the path that matches your workflow, and soon your photos will be synced and accessible across all your Apple devices without extra effort.
Online Storage Services Supported by CloudsLinker
Transfer data between over 44 cloud services with CloudsLinker
Didn' t find your cloud service? Be free to contact: [email protected]
Further Reading
Effortless FTP connect to google drive: Transfer Files in 3 Easy Ways
Learn More >
Google Photos to OneDrive: 3 Innovative Transfer Strategies
Learn More >
Google Photos to Proton Drive: 3 Effective Transfer Techniques
Learn More >


