How to Move Files from iCloud Drive to Dropbox: 4 Simple Methods (2026 Guide)
Migrating files from iCloud Drive to Dropbox is easier than you think. This guide breaks down four proven methods—from quick drag-and-drop uploads to advanced cloud-to-cloud transfers—so you can move your data efficiently without eating up local bandwidth.
Introduction
With many users juggling multiple cloud platforms, transferring files between services like iCloud Drive and Dropbox has become a routine need. Whether you're shifting platforms, organizing your digital storage, or syncing files across teams and devices, knowing the right migration method can save you time and frustration. In this guide, you'll explore four different ways to move your data—from simple browser uploads and iPhone-based transfers to powerful command-line tools like Rclone and automated solutions such as Cloudslinker. Whether you're tech-savvy or just want the easiest option, there's a method here for you.
iCloud Drive is Apple’s built-in cloud storage service, designed to work seamlessly across macOS, iOS, and Windows. Every Apple ID comes with 5 GB of free storage, and you can expand that capacity up to 12 TB with iCloud+.
- Sync across devices: Your Mac’s Desktop and Documents folders are mirrored across iPhones, iPads, and even the iCloud web interface.
- Handles large uploads: Store individual files up to 50 GB, suitable for creative professionals working with high-resolution assets.
- Multi-platform compatibility: Access iCloud Drive from Finder (Mac), Files app (iOS), File Explorer (Windows), or any modern browser.
- Team collaboration: Share folders with others, assign permissions, and co-edit documents in real time.
- Privacy-focused: With end-to-end encryption and support for Advanced Data Protection, your files remain secure throughout the Apple ecosystem.
Dropbox is a widely used cloud storage platform designed for personal use, creative teams, and businesses. It allows for automatic backup, file versioning, and sharing in real-time across multiple platforms.
- Free & premium tiers: Offers 2 GB free for starters, and up to 3 TB or more with paid plans.
- Cross-platform access: Works on Windows, macOS, Linux, iOS, Android, and directly through any browser.
- Smart Sync: Keeps your local storage clear by syncing files to the cloud while appearing native on your computer.
- File recovery: Restore deleted files or revert to older versions within 30 to 180 days depending on your plan.
- Collaboration tools: Integrated with Dropbox Paper, Slack, Zoom, and more—perfect for team workflows.
If you’re planning to migrate from iCloud Drive to Dropbox, you’re not alone. Many users—especially those who want better cross-platform access, version history, or team collaboration—have found Dropbox to be a more flexible option for both personal and work-related file management.
- Multi-Device Consistency: Dropbox offers native apps on nearly every platform—including macOS, Windows, iOS, Android, and Linux—ensuring seamless syncing regardless of your setup.
- Powerful File Recovery: Dropbox maintains a complete version history (up to 180 days for some plans), letting you retrieve older versions or restore deleted files with ease.
- Live Collaboration: Work with others in real-time using tools like Dropbox Paper and shared folders. Changes sync instantly, whether you're on mobile or desktop.
- Selective Sync & Smart Sync: Save local storage by choosing what gets downloaded. With Smart Sync, files appear in your file explorer but live in the cloud until needed.
- Enterprise-Grade Protection: Dropbox uses AES-256 bit encryption at rest and SSL/TLS in transit, plus supports two-step verification and Dropbox Vault for sensitive documents.
- Flexible Plans: Whether you're an individual or part of a larger team, Dropbox offers storage from 2 GB free up to multiple TBs, with options for personal, family, and business use. Explore pricing here.
- Third-Party App Integration: Dropbox connects with Zoom, Slack, Microsoft Office, and Google Docs, making it easy to manage your work across platforms.
Whether you're ditching iCloud for broader compatibility or seeking better productivity workflows, Dropbox is a reliable destination for your files. Its cross-platform functionality, file control features, and collaborative tools make it an ideal cloud companion beyond the Apple ecosystem.
If you're considering moving files from iCloud Drive to Dropbox, it's worth looking at how these two platforms differ. While both offer reliable cloud storage, they cater to slightly different needs when it comes to sharing, syncing, and collaboration.
| Feature | iCloud Drive | Dropbox |
|---|---|---|
| Free Storage | 5 GB | 2 GB (upgradeable via referral or paid plans) |
| Platform Integration | Native to Apple ecosystem (macOS, iOS) | Multi-platform: macOS, Windows, Linux, iOS, Android, Web |
| Collaboration Capabilities | Best with Apple apps like Pages, Numbers | Real-time editing via Dropbox Paper, shared folders, and third-party tools |
| Third-Party Integration | Mostly Apple services | Strong support for Zoom, Slack, Microsoft Office, Google Docs |
| File Versioning & Recovery | Limited; depends on app and storage plan | Version history up to 180 days with easy recovery |
| Security | End-to-end encryption, with optional Advanced Data Protection | Data encryption at rest and in transit, two-step verification, plus Dropbox Vault |
While iCloud Drive works beautifully within the Apple ecosystem, Dropbox shines when it comes to flexibility, device compatibility, and collaborative workflows. If you use multiple platforms or need better file control, Dropbox may be the better fit.
Before diving into the migration process, it’s a good idea to review what’s inside your iCloud Drive. Make a note of how much storage you’re currently using, and what kinds of files you’ll be transferring. Since Dropbox’s free plan starts with 2 GB, you may want to consider whether you’ll need to upgrade to a paid plan to fit your data.
If you haven’t already, sign up for a Dropbox account at dropbox.com/basic. The setup is quick, and once your account is ready, you'll be able to use Dropbox across multiple devices—including your Mac, PC, and smartphone. By having your login ready and space accounted for, you’ll ensure a smoother, more organized transfer process.
You might also want to organize your files into folders on iCloud Drive beforehand. This makes it easier to batch-upload them to Dropbox and replicate the same folder structure—especially if you’re using Dropbox Backup or syncing from multiple devices.
Method 1: Transfer via Web Browsers
Step 1: Download Files from iCloud Drive
Start by visiting the official iCloud Drive web interface and logging in with your Apple ID. Once
you're in, navigate to the folders or files you want to move. You can select multiple items by
holding the Command key on a Mac or Ctrl on Windows.
Click the download icon (a cloud with a downward arrow) located in the toolbar. If you download a full folder, iCloud will bundle it into a ZIP file. Once it’s downloaded, unzip the file locally to access the contents before uploading.
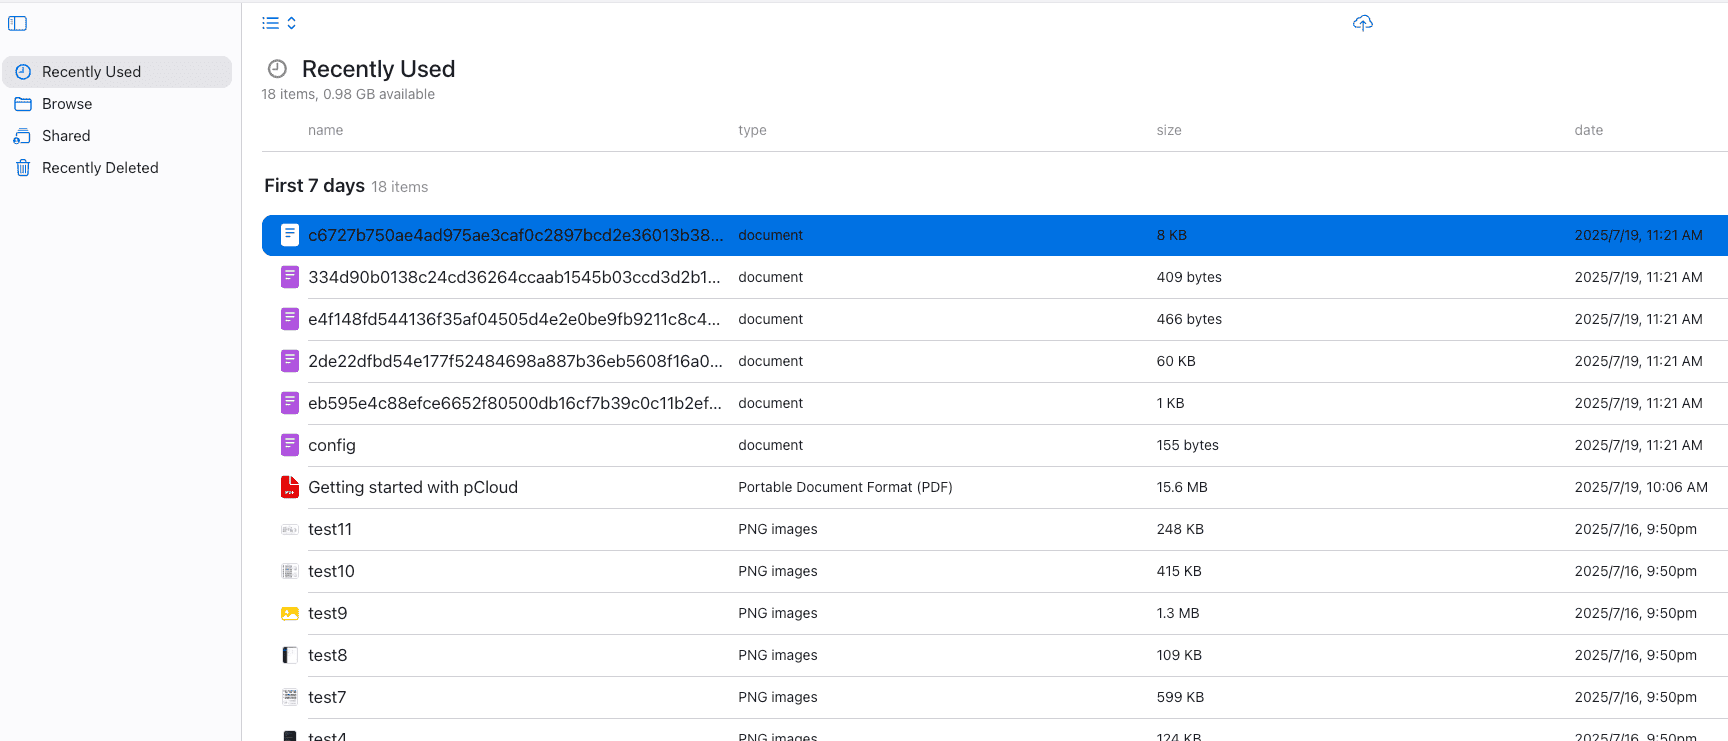
Step 2: Upload Files to Dropbox
Next, go to Dropbox.com and sign in to your account. If you don’t have one, you can quickly create a free account here. Once logged in, click the "Upload" button in the right-hand panel, or simply drag your files and folders into the browser window.
You can organize your content by creating new folders or renaming files directly within Dropbox. If you’ve unzipped a folder from iCloud, consider replicating the same folder structure on Dropbox for consistency.

This drag-and-drop approach is quick and easy for occasional transfers or smaller file batches. However, if you’re migrating large directories or need to preserve a more complex folder structure, a manual browser-based process might become inefficient. In such cases, using sync tools or a dedicated cloud-to-cloud transfer service could be more effective.
Method 2: Transfer Using Your iPhone
Step 1: Launch the Dropbox App and Choose Upload
On your iPhone, open the Dropbox app and log into your account. Once you're in, tap the “+” (plus) icon, usually at the bottom of the screen. From the menu that appears, select “Upload Files”. This will open up the iOS file picker interface.

Step 2: Navigate to iCloud Drive and Select Files
From the iOS file browser, choose “iCloud Drive” as your source. You’ll be able to browse your folders and tap on any files you want to upload. Note that if some files aren’t stored locally on your iPhone, they might take a few seconds to load or download before Dropbox can begin transferring them.
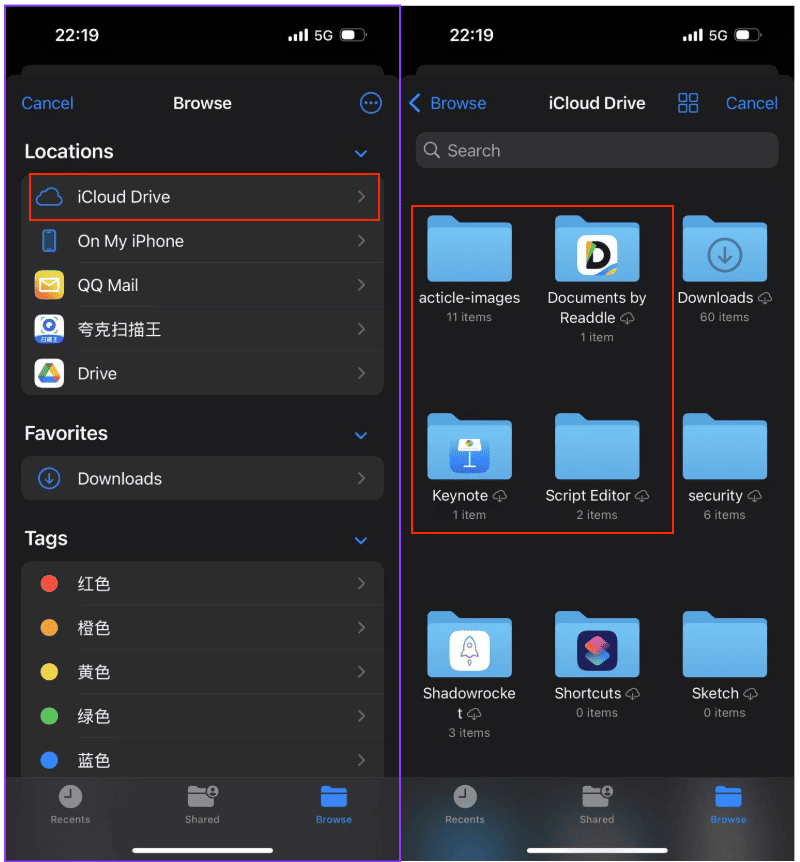
This approach is great if you’re working from your iPhone and want to quickly back up documents, PDFs, or photos into Dropbox without needing a computer. It’s a smooth, built-in experience using Apple’s Files system and Dropbox’s mobile upload tools. However, for bulk file transfers or nested folders, it might be more efficient to switch to a desktop or automated method.
Method 3: Command-Line Transfer with Rclone
Step 1: Install Rclone and Set Up Your Remotes
For users who prefer command-line tools and need more control over the migration process, Rclone is a powerful open-source utility that supports a wide range of cloud services—including both iCloud Drive and Dropbox.
Begin by installing Rclone from the official downloads page. Once installed, launch the terminal and run:
rclone config to start configuring your remotes.
- Option 1 – iCloud via Local Folder: If you’re on macOS, you can access your iCloud
Drive files directly at
~/Library/Mobile Documents/com~apple~CloudDocs. - Option 2 – iCloud as a Remote: Rclone now supports iCloud Drive as a full remote
backend. You can add it by selecting
icloudduringrclone config. This lets you access and transfer files without relying on a locally synced folder. See the iCloud backend documentation for authentication steps and API token setup. - Dropbox Remote: Choose
dropboxas your destination and authorize your account through the browser popup that Rclone will trigger.
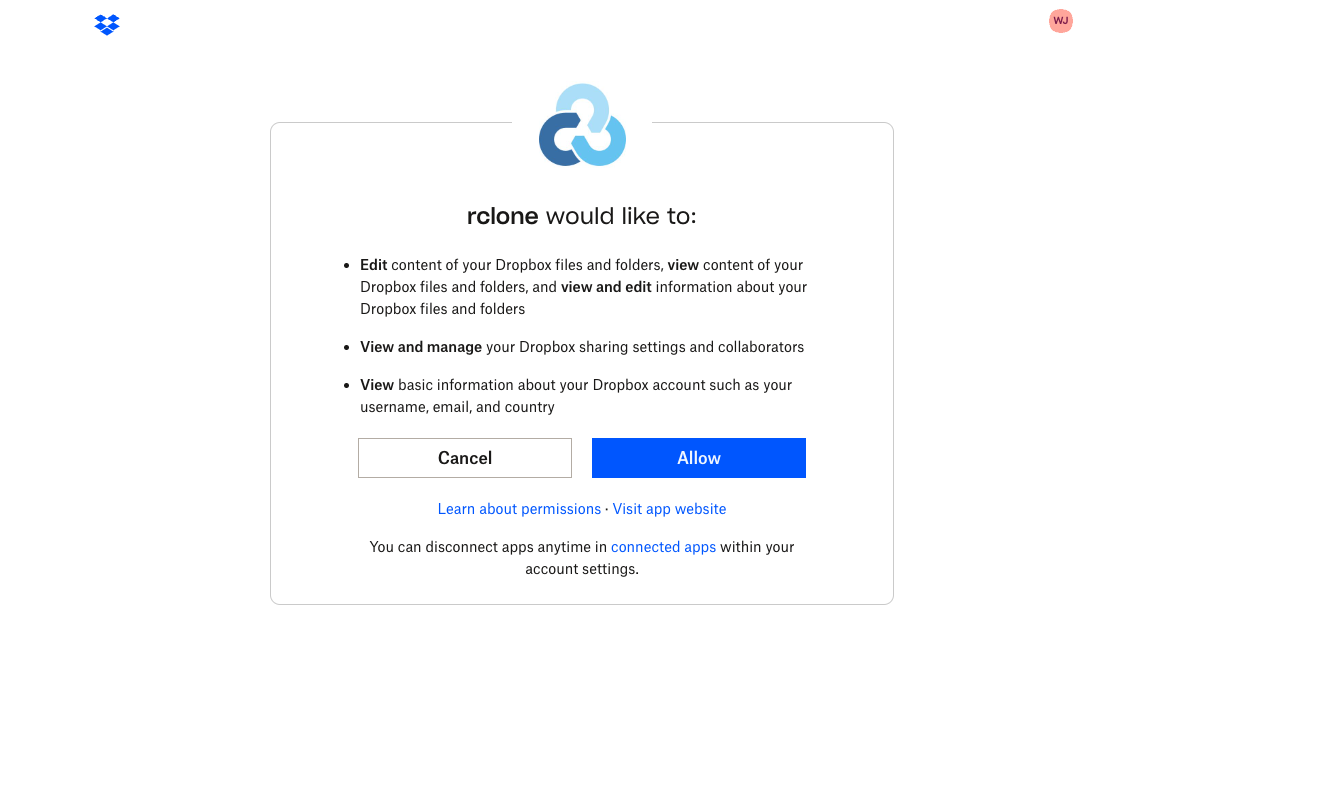
Step 2: Start the Transfer
Once your remotes are configured, you're ready to begin transferring files. Depending on how you configured your iCloud access, here are two examples:
rclone copy "~/Library/Mobile Documents/com~apple~CloudDocs" dropbox:iCloudBackup --progressrclone copy icloud:/Documents dropbox:iCloudBackup --progress
In both cases, files from your iCloud Drive (local or remote) will be copied into a folder called
iCloudBackup in your Dropbox account. You can use --dry-run to simulate the
command before committing, or --exclude to skip certain files or types.

Rclone is an excellent choice for tech-savvy users who want to automate or script the migration process. With options like bandwidth limits, filters, and scheduled syncs via cron or Task Scheduler, it provides unmatched flexibility. Just note that initial setup—especially for the iCloud remote—requires careful reading of the documentation and token management.
Method Four: Cloud-to-Cloud Transfer with Cloudslinker
Overview: iCloud Drive to Dropbox Made Simple
Cloudslinker
is a powerful tool that enables direct cloud-to-cloud file transfers—no downloads, no uploads, and
no local storage required. It currently supports 40+ major cloud platforms, including
iCloud Drive and Dropbox, with tasks processed entirely in the
cloud.
Step 1: Log in to Cloudslinker
Head over to app.cloudslinker.com and log into your account. If you’re a new user, registration is free. On the dashboard, click "Add Cloud" in the left sidebar. Start by connecting your Dropbox account. You'll be redirected to Dropbox's OAuth page to securely authorize access.

Dropbox accounts are typically one-to-one—unlike Microsoft accounts, you won't see sub-clouds for personal/business disks. Once added, your Dropbox drive will appear as a single connection in Cloudslinker.
Step 2: Connect iCloud Drive
Next, choose iCloud Drive from the cloud list. Enter your Apple ID and password when prompted. If you have two-factor authentication enabled, you’ll be asked to enter the verification code sent to your Apple device. After successful login, your iCloud Drive will be fully linked.
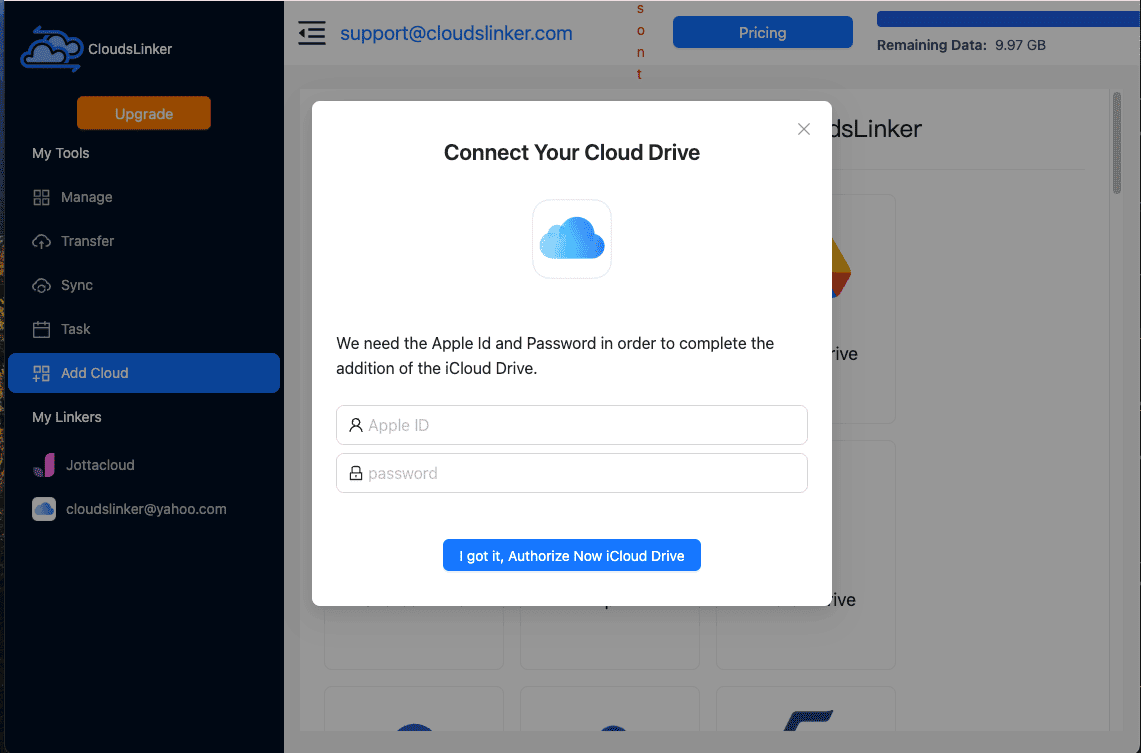
Step 3: Configure Your Transfer
Go to the Transfer section and select iCloud Drive as the source. Then choose the files or folders you want to move. On the right-hand side, select Dropbox as the destination. You can preview the folder structure of both clouds before confirming.

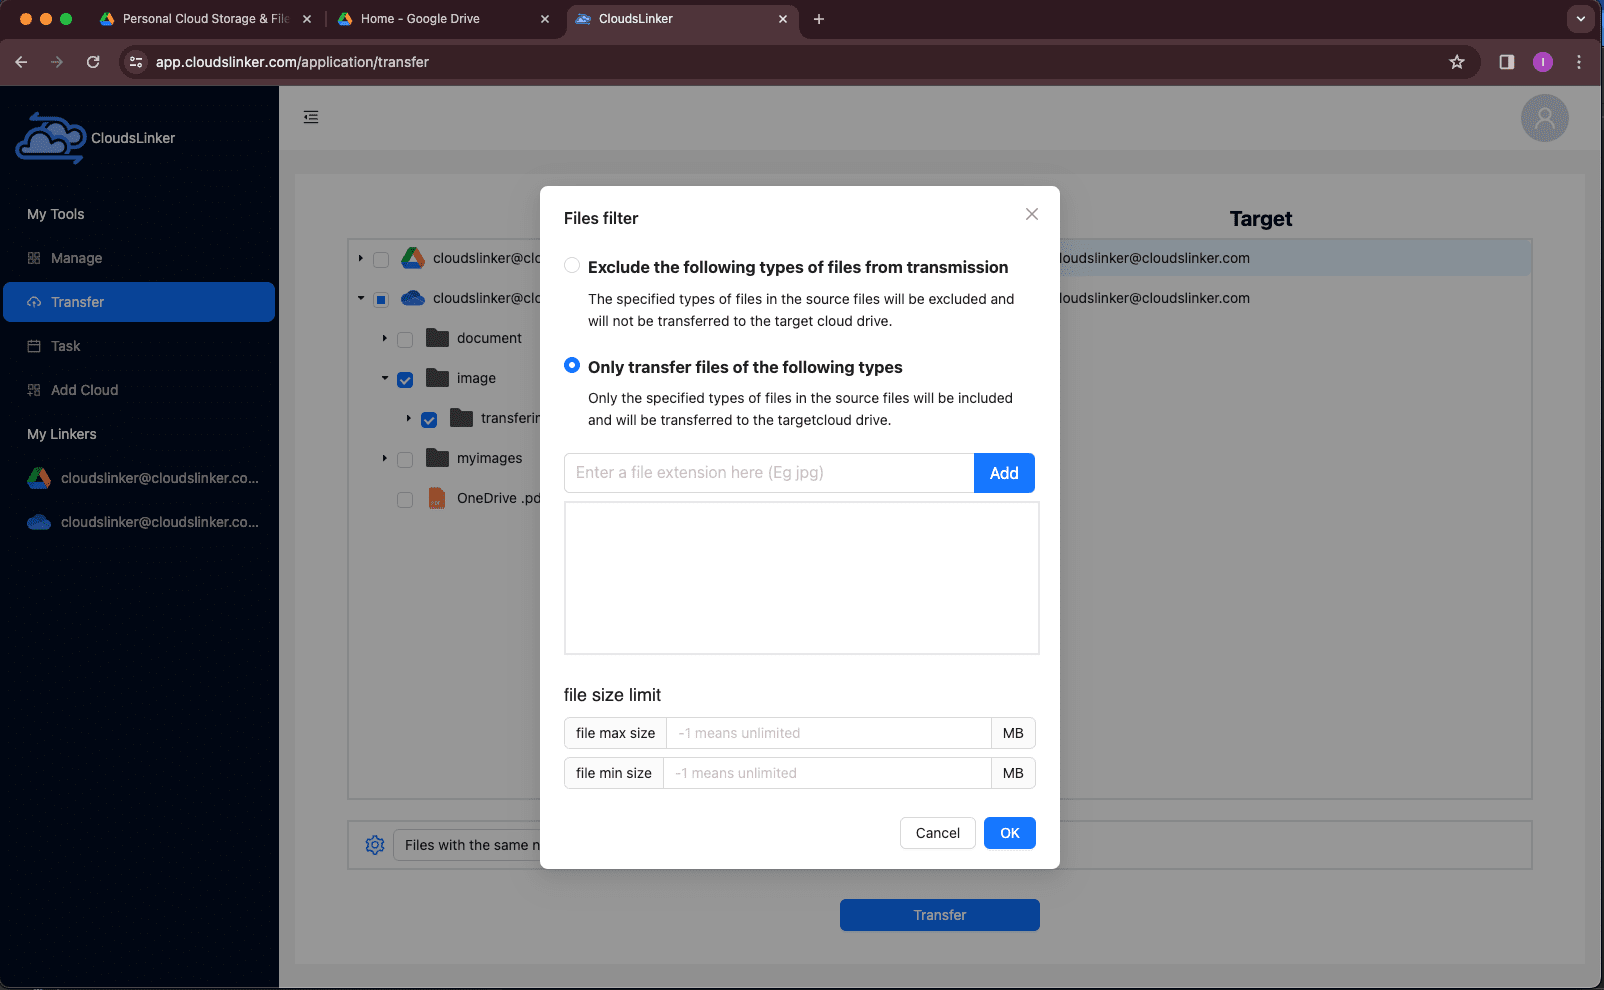
Need to filter what you move? Use advanced settings to exclude system files like
.DS_Store, skip large videos, or migrate only files modified in the last 30 days. These
filters give you flexibility for both simple and complex transfers.
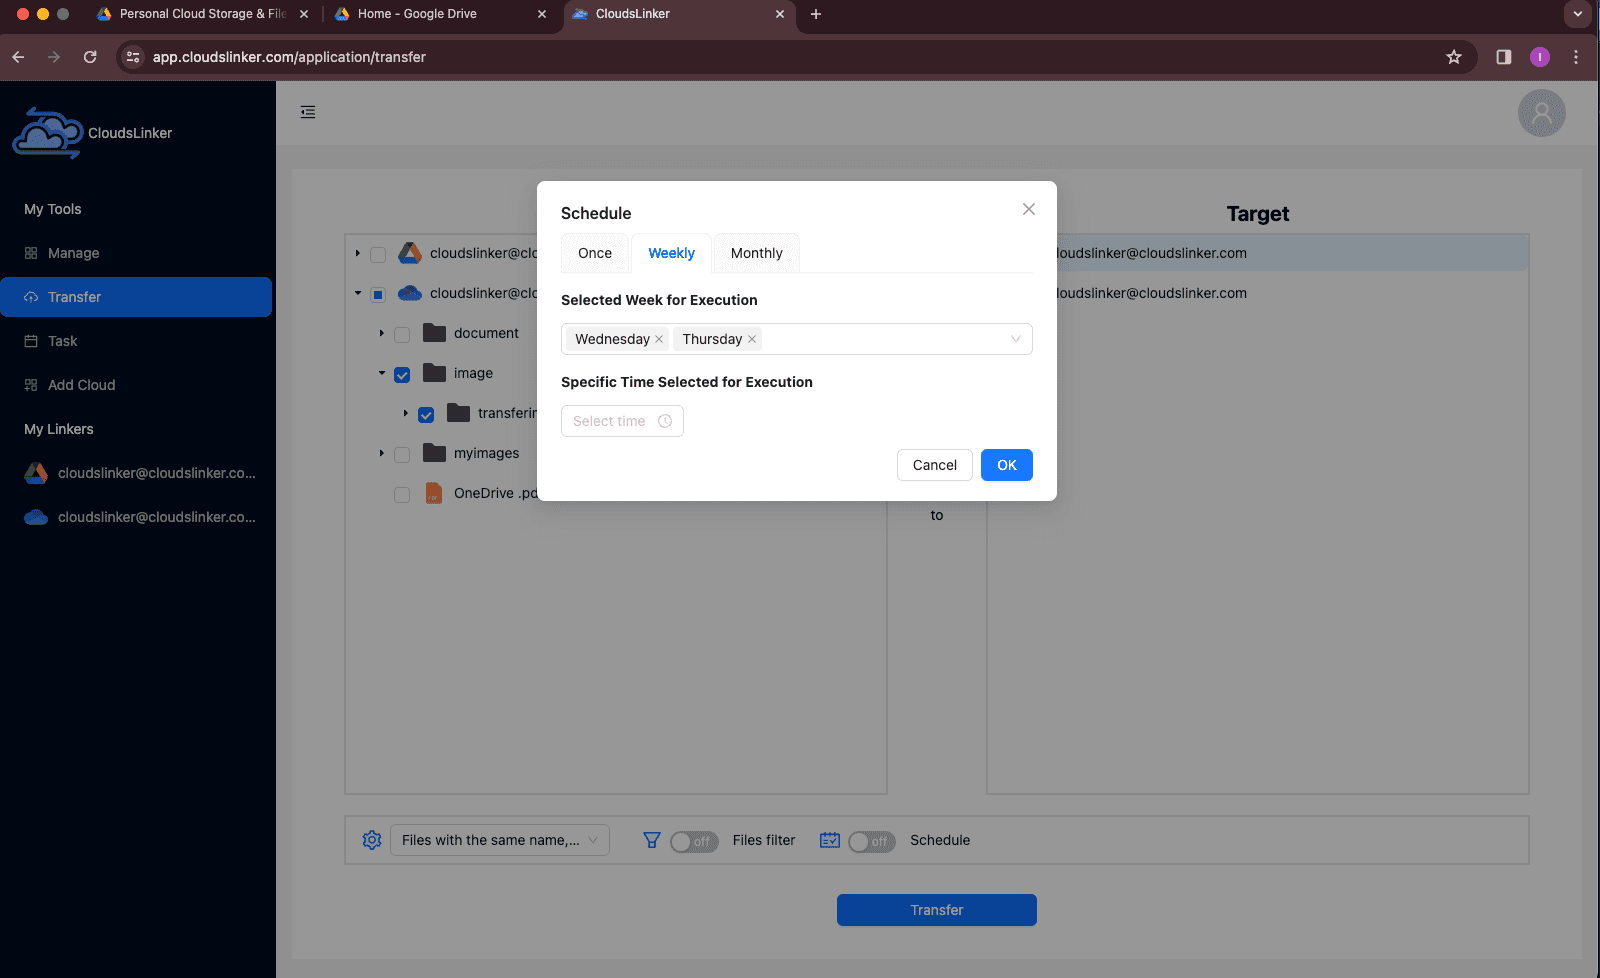
Planning to keep your Dropbox in sync with iCloud Drive? You can schedule recurring tasks—daily, weekly, or even hourly—under the Schedule tab. Learn how to automate workflows with our Cloudslinker scheduling guide.
Step 4: Monitor and Finalize
Once initiated, the transfer will appear in your Task List. You’ll see real-time progress, speed, and estimated completion time. Tasks can be paused, resumed, or re-run if needed. Any files that fail due to unsupported formats or permissions will be clearly marked.
Step 5: Review Completion Report
After everything is transferred, you’ll receive a confirmation summary including success/failure logs. All selected files from iCloud Drive are now safely stored in your Dropbox cloud.
For those who want a fast, reliable, and hands-off way to migrate data, Cloudslinker is one of the best solutions available. It combines simplicity with powerful customization—making it a smart choice for individuals and teams alike.
Need to Move Files Between Other Clouds?
Whether you're using Google Drive, MEGA, pCloud, Box, or WebDAV, Cloudslinker makes it easy to migrate or sync between them—all from your browser, with zero local bandwidth usage.
Comparing the 4 Ways to Transfer from iCloud Drive to Dropbox
There’s no one-size-fits-all method for moving files from iCloud Drive to Dropbox. Your ideal option depends on how much data you’re working with, your technical comfort level, and whether speed or simplicity matters more. Here's a side-by-side comparison to help you choose the approach that best fits your workflow:
| Method | Ease of Use | Speed | Best Suited For | Uses Local Bandwidth | Skill Level |
|---|---|---|---|---|---|
| Web Browser (Manual) | ★★★★★ | ★★★☆☆ | Quick, small transfers | Yes | Beginner |
| iPhone Upload via Dropbox App | ★★★★★ | ★★★☆☆ | Mobile users moving a few files | Yes | Beginner |
| Rclone (Command-Line) | ★★☆☆☆ | ★★★★★ | Power users, automated transfers | Yes / No (if remote iCloud configured) | Advanced |
| Cloudslinker (Cloud-Based) | ★★★★★ | ★★★★★ | Large folders, long-term syncing, zero hassle | No | Beginner |
If you're just looking to move a few documents or photos, using the browser or Dropbox mobile app should get the job done quickly. More technical users might prefer Rclone for automation and scripting. But for most people—especially those transferring a lot of data or managing frequent cloud-to-cloud moves—Cloudslinker is by far the easiest and most efficient method. Because the transfer happens entirely in the cloud, it doesn’t rely on your device staying online or using up your internet bandwidth.
Moving files from iCloud Drive to Dropbox is usually straightforward, but there are a few things worth noting to make sure everything goes smoothly—especially if you're transferring a lot of data or using a manual method:
- Files Must Be Fully Downloaded: If you’re using Finder or a desktop sync tool, double-check that your iCloud Drive files are stored locally—not just as cloud placeholders. Files that haven't been downloaded may not transfer properly.
- Dropbox File Limits: Dropbox supports files up to 2 TB with the desktop client, but only 50 GB via browser uploads. Cloud transfer platforms like Cloudslinker can bypass these restrictions by transferring directly between servers.
- Bandwidth Bottlenecks: Manual transfers rely on your internet connection speed. If your home network is slow or unstable, consider using a server-side transfer tool like Cloudslinker to avoid performance issues.
- Check Your Dropbox Plan: Free Dropbox accounts offer only 2 GB of storage. If you're transferring a large volume of data, make sure you have enough space or upgrade your plan before starting the migration.
- Choose Secure Tools: When handling cloud credentials, always use services that offer OAuth authentication and encrypted file handling. Cloudslinker uses secure access tokens and AES-256 encryption to protect your data—your login credentials are never stored.
- Handling Massive Transfers: Planning to migrate hundreds of gigabytes—or even more? Use a service that supports background processing, scheduled sync, and error recovery. Cloudslinker can resume interrupted tasks and keep running even if your device goes offline.
Taking a few moments to prepare can save you hours of frustration. Whether you're transferring a handful of files or syncing entire directories, knowing the limitations and best practices ahead of time ensures a smooth move from iCloud Drive to Dropbox.
Frequently Asked Questions
Watch Our Step-by-Step Video Tutorial
Learn how to transfer files from iCloud Drive to Dropbox with our clear, visual walkthrough. This tutorial is perfect for anyone—whether you're new to cloud storage or just looking for the easiest method. We’ll guide you through every step, from accessing your files in iCloud to syncing them with Dropbox using various tools including Cloudslinker. Get expert tips, avoid common mistakes, and simplify your cloud migration process. Watch now and move your files with confidence!
Conclusion
We’ve walked through four practical ways to move your files from iCloud Drive to Dropbox—each with its own strengths. For quick one-off transfers, browser-based or iPhone uploads work well. For more technical users or large datasets, Rclone offers speed and scriptability. And if you want maximum convenience without using your internet connection, Cloudslinker is the standout solution—it transfers everything directly in the cloud, even if your computer is turned off. Choosing the right approach means you’ll not only save time, but also keep your files structured and accessible across platforms.
Online Storage Services Supported by CloudsLinker
Transfer data between over 47 cloud services with CloudsLinker
Didn' t find your cloud service? Be free to contact: [email protected]
Further Reading
Effortless FTP connect to google drive: Transfer Files in 3 Easy Ways
Learn More >
Google Photos to OneDrive: 3 Innovative Transfer Strategies
Learn More >
Google Photos to Proton Drive: 3 Effective Transfer Techniques
Learn More >


