From FTP/SFTP to SharePoint: Transferring Files Without Local Downloads
Still relying on FTP or SFTP servers for daily file transfers? This guide explains why many teams are moving from traditional file servers to SharePoint, and how to migrate data safely while preserving structure, access, and operational continuity.
Introduction
FTP and SFTP have been the backbone of file exchange for decades. They’re predictable, scriptable, and deeply embedded in many operational workflows — from media delivery and software builds to financial exports and partner data drops. For a long time, that was enough. But as teams grow and collaboration becomes more document-centric, the limitations of protocol-based file servers become harder to ignore. Most organizations today already live inside Microsoft 365. Email runs through Outlook, meetings happen in Teams, and documents are edited collaboratively in Word or Excel. Meanwhile, critical files still sit behind FTP or SFTP endpoints, accessible only through separate clients, credentials, and manual processes. The result is a quiet disconnect: files exist, but they’re not truly part of how people work day to day. SharePoint represents a shift away from raw file transfer toward shared, governed content. It combines document libraries, version history, access auditing, and native integration with Microsoft apps into a single environment. For teams maintaining legacy FTP/SFTP infrastructure, moving files into SharePoint isn’t about abandoning what works — it’s about reducing friction, improving visibility, and bringing files closer to the tools people already use. This article looks at why organizations are transitioning from FTP or SFTP servers to SharePoint, what practical concerns to address before migrating, and how to complete the transfer efficiently — without downloading files to a local machine.
FTP and its secure counterpart SFTP have long been used as reliable mechanisms for moving files between systems. They are especially common in infrastructure-heavy environments such as hosting providers, software distribution, manufacturing pipelines, and system integrations where automation matters more than collaboration.
- Protocol-driven access: Files are accessed through credentials and endpoints, not user context.
- Automation-friendly: Widely used in scripts, cron jobs, and CI/CD workflows.
- Minimal abstraction: Direct interaction with directories and files.
- Security via transport: SFTP encrypts sessions over SSH.
- No native collaboration layer: Versioning, comments, and approvals are external.
Microsoft SharePoint is designed around people and teams rather than protocols. Files live inside sites that represent departments, projects, or business units, and access is governed by identity rather than raw credentials.
- Context-aware storage: Documents belong to sites and libraries.
- Native Microsoft 365 integration: Tight coupling with Teams, Outlook, and Office.
- Identity-based permissions: Access tied to users, groups, and policies.
- Built-in version control: Automatic history and rollback.
- Governance-ready: Retention, auditing, and compliance tooling included.
Although both approaches ultimately store files, they solve very different problems. FTP and SFTP focus on reliable transfer between systems, while SharePoint centers on collaboration, governance, and long-term document management.
| Aspect | FTP / SFTP | Microsoft SharePoint |
|---|---|---|
| Core Purpose | File transfer between systems | Collaborative document management |
| Structure | Raw directory hierarchy | Sites and document libraries |
| Access Model | Username / key-based authentication | Identity and policy-based access |
| Integration | External to productivity tools | Embedded in Microsoft 365 |
| Typical Scenario | System-to-system data exchange | Team and enterprise collaboration |
In short, FTP/SFTP excels at moving files efficiently, while SharePoint excels at helping people work with those files once they arrive.
Before transferring data from an FTP or SFTP server into SharePoint, it’s worth thinking beyond a simple folder copy. SharePoint performs best when content is organized around teams or functions, not just mirrored from legacy directory trees.
Permissions are another key factor. FTP servers typically rely on coarse-grained access, while SharePoint enforces permissions at multiple layers. Ensuring that target sites and libraries are properly configured ahead of time prevents failed uploads or misplaced files.
Finally, consider scale and reliability. Small datasets can be moved manually, but large transfers benefit from automated, cloud-based approaches that are not tied to a single machine or local network stability.
Method 1: Download from FTP/SFTP and Upload Manually
Step 1: Retrieve Files from the FTP or SFTP Server
Begin by connecting to your FTP or SFTP server using a client such as FileZilla, WinSCP, or a command-line tool if that’s how your workflow is set up. Authenticate with the appropriate credentials or SSH keys, then navigate through the directory structure to locate the files or folders you intend to move into SharePoint.
Select the required items and download them to a local working directory. For larger folders, this process may take some time and will depend heavily on both server throughput and local network stability. Once the transfer completes, verify that the directory structure and file integrity remain intact before proceeding.
⬇️ Pull data from the FTP/SFTP server onto a local machine
Step 2: Upload Files into SharePoint
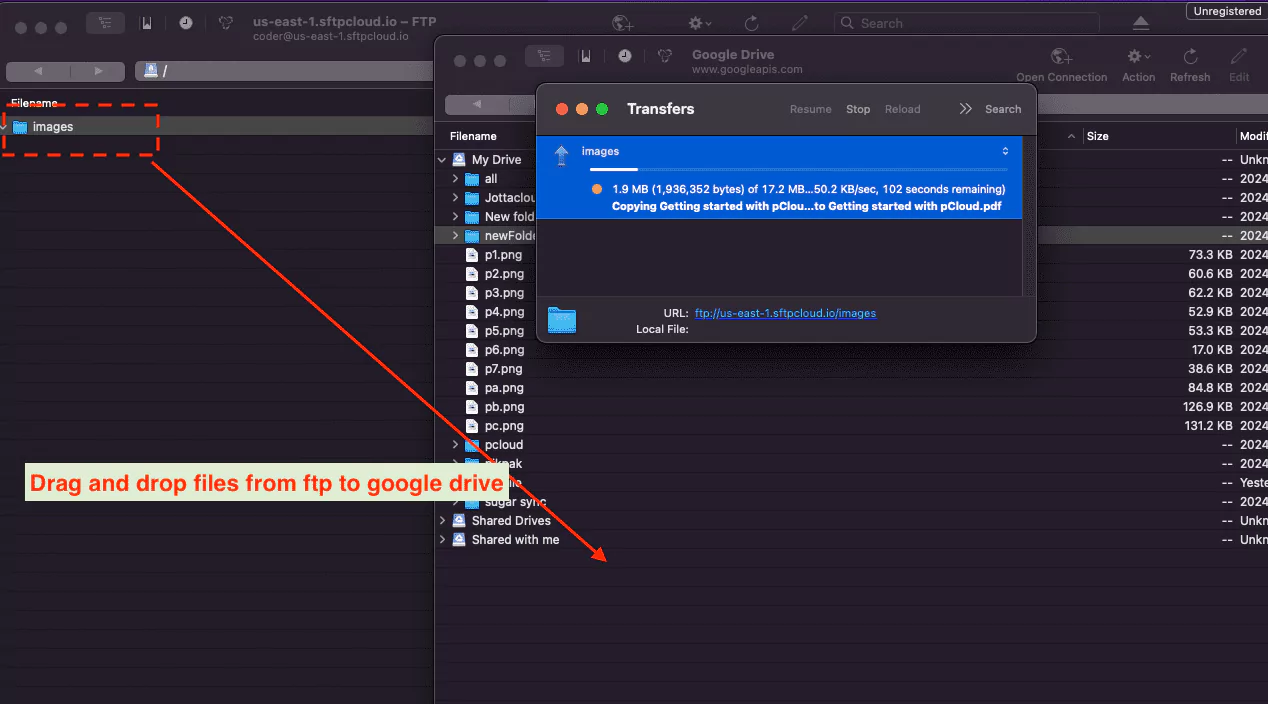
Next, open your destination SharePoint site in a browser and navigate to the appropriate document library. You can upload content using the Upload button in the toolbar or by dragging files and folders directly into the library view. SharePoint will recreate the folder hierarchy as it appears on disk.
This stage often highlights a structural difference between file servers and SharePoint. FTP and SFTP servers typically reflect operational or system-driven layouts, while SharePoint libraries are usually organized around teams, projects, or business functions. Taking a moment to map folders to the right libraries can reduce cleanup work later.
⬆️ Push local files into the selected SharePoint document library
Manual download-and-upload works best when the data set is small or the task is a one-off migration. As file counts grow or transfers become recurring, this approach quickly shows its limits — local disk space, interrupted connections, and the need to keep a workstation running can all become bottlenecks. For those cases, automated or cloud-based transfer methods are usually a better fit.
Method 2: Transferring Files with Rclone from FTP/SFTP to SharePoint
Step 1: Install Rclone and Define Your Remotes
For teams that are comfortable working from the command line, rclone offers a flexible way to bridge traditional file servers and SharePoint. Instead of relying on browsers or manual uploads, rclone treats both FTP/SFTP endpoints and SharePoint libraries as addressable storage targets.
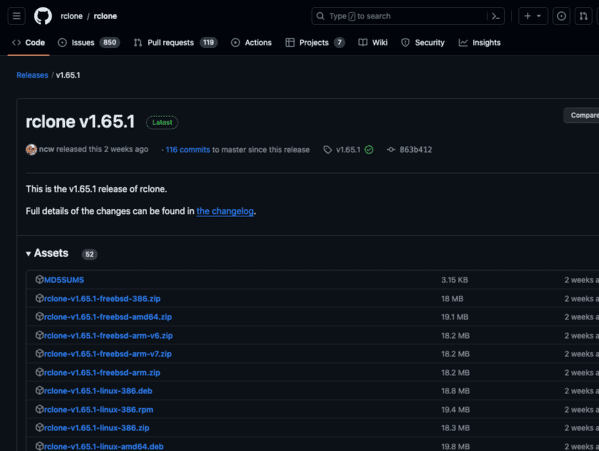
Start by installing the latest rclone release on a machine with stable network
access. Once installed, open a terminal and launch the interactive configuration
wizard with rclone config. Each connection you define becomes a
“remote” that rclone can read from or write to.
-
FTP or SFTP remote:
When prompted to choose a storage type, select
ftporsftpdepending on your server. You’ll be asked for the host, port, username, and authentication method (password or SSH key). After setup, the remote behaves like a mounted directory tree. -
SharePoint remote:
SharePoint access is configured using the
onedrivebackend. During setup, rclone will ask which Microsoft storage variant you want — choose SharePoint, then authenticate with your Microsoft 365 account. You can select the target site and document library where files should land.
Step 2: Run the Transfer Command
With both remotes defined, transferring data becomes a matter of issuing the appropriate rclone command. For example, copying a directory from an SFTP server into a SharePoint document library can be done as follows:
rclone copy sftp:/data/projects sharepoint:/SharedDocuments/Projects --progress
This performs a one-way copy and leaves the source server untouched. If your goal is to keep SharePoint continuously aligned with an FTP directory, a synchronization command may be more suitable:
rclone sync ftp:/exports sharepoint:/Exports --progress --exclude "*.log"
Before running any large-scale job, it’s strongly recommended to test with
--dry-run.
This allows you to confirm which files would be transferred or removed,
without making actual changes on either side.
Rclone works well for repeatable migrations and scripted workflows. It supports scheduling, filtering, and rate limiting, making it attractive for technically inclined teams. That said, setup complexity and the need to manage credentials locally can be drawbacks — especially when SharePoint site selection or permission boundaries are not well documented internally.
Method 3: Cloud-to-Cloud Transfer from FTP/SFTP to SharePoint with CloudsLinker
Overview: Move FTP/SFTP Files to SharePoint Without Downloading
CloudsLinker is designed for migrations where you don’t want a laptop acting as a “middleman.” The transfer runs in the cloud: files move from your FTP/SFTP endpoint straight into Microsoft SharePoint Online without being downloaded to your computer first. Once a task starts, it keeps running even if you close the tab or your device goes offline.
Step 1: Add FTP or SFTP as the Source
Sign in to app.cloudslinker.com and open your dashboard. Click Add Cloud, then search for FTP or SFTP from the supported list.
Enter your server endpoint (host/IP). One important note: the endpoint must be reachable from the public internet — if it’s only accessible inside a private network, CloudsLinker’s servers won’t be able to connect to it. Then fill in the port (SFTP commonly uses 22 by default), along with your username and password.
If your account is restricted to a specific directory (or you want to scope access for safety), set the Access Path to the allowed folder path. This helps prevent accidental browsing outside the intended directory tree and keeps the migration focused.

Step 2: Connect SharePoint as the Destination
Next, add Microsoft SharePoint as the destination cloud. Sign in with your Microsoft 365 account and approve access. CloudsLinker will prompt you to choose the SharePoint site where the files should be placed.
If the site contains multiple document libraries, select the exact document library up front. This is useful when different teams store content in different libraries and you want the migration to land in the correct workspace from day one.

Step 3: Choose Source Data and Set the Target Folder
Open the Transfer page. On the left, select your connected FTP/SFTP source and browse to the folders you want to move. On the right, select SharePoint and choose the destination folder inside the selected library.
This is also where you can “translate” a server-style directory layout into a SharePoint-friendly structure. If your FTP tree is organized by dates, exports, or system modules, you can map it into a clearer SharePoint path aligned with a project, department, or team.

Step 4: Start the Task and Monitor Progress
Start the transfer and track it from the task panel. CloudsLinker provides status updates, transferred counts, and error details if something fails mid-way. You can pause and resume tasks when needed.
When the task completes, you’ll see a summary of what succeeded and what was skipped or retried. Your files will be available in SharePoint, ready for collaboration and ongoing access.
If you’re moving a large dataset, or you simply don’t want to babysit a desktop upload, this approach removes the usual pain points: no local downloads, no dragging folders into a browser, and no keeping a workstation online for hours. Everything runs in the cloud through CloudsLinker.
Need to Move Data Across More Platforms?
In addition to SharePoint, CloudsLinker supports transfers across many services (including OneDrive, WebDAV, MEGA, and more) — all executed online so you don’t need to run long, fragile transfers from a local computer.
Planning a move from an FTP/SFTP server to Microsoft SharePoint is one of those tasks that looks simple on paper (“copy files from A to B”) and then immediately turns into a choice of trade-offs. Are you moving a few folders or an entire archive? Do you need something repeatable? Can the migration run unattended, or will someone babysit it? The quick comparison below shows how the three most common approaches behave in real life.
| Approach | Learning Curve | Transfer Performance | Best Fit Scenarios | Depends on Local Network | Technical Skill |
|---|---|---|---|---|---|
| Manual Download & Upload | Very Low | Moderate | Small batches, one-off moves, quick cleanups | Yes | Beginner |
| Rclone (Command-Line) | Medium | High | Repeatable jobs, filtering, scheduled sync-style workflows | Yes | Advanced |
| CloudsLinker (Cloud-to-Cloud) | Low | High | Large datasets, long-running transfers, unattended execution | No | Beginner |
If you’re moving a small directory (or you only need to do this once), manual download + upload is often “good enough.” It’s straightforward, requires no tooling, and you immediately see what landed in the SharePoint library. The downside is that you’re limited by your computer, your browser, and your network— and large folders can quickly turn into an all-afternoon ritual.
Rclone becomes attractive when you want something repeatable and controllable (filters, retries, automation). For SharePoint connections, rclone uses the OneDrive backend and guides you through selecting SharePoint during configuration (rclone OneDrive/SharePoint documentation). It’s powerful, but it assumes a stable local environment and someone comfortable debugging command-line jobs.
If your priority is “start it and forget it,” a cloud-run transfer is typically the least painful. With CloudsLinker, data moves from your FTP/SFTP endpoint into SharePoint online without routing through your local machine, which helps avoid local bandwidth bottlenecks and browser timeouts. (Just remember: the FTP/SFTP endpoint must be reachable from the public internet for CloudsLinker to connect.)
Moving content from FTP/SFTP into SharePoint is usually very doable, but a little preparation saves a lot of rework—especially when you’re dealing with deep folder trees, mixed ownership, or SharePoint library rules.
- Confirm the FTP/SFTP endpoint is reachable: If you’re using a cloud-run method, the host must be accessible over the public internet. If it’s behind a private network, you’ll need a safe way to expose it (or use a local method).
- Decide how you’ll scope access: If the account should only see one directory, set an explicit base path (e.g., “Access Path”) so the migration can’t wander into unrelated directories by accident.
- Plan where the SharePoint content should live: SharePoint isn’t “just folders.” Pick the right site and document library first, then map your server directories into that structure. It’s much easier than reorganizing after everything has landed.
- Watch file names and path length limits: SharePoint and OneDrive have naming and path restrictions that can cause uploads to fail. It’s worth scanning for problematic names or deeply nested paths before running a big job (Microsoft’s OneDrive/SharePoint restrictions and limitations).
- Verify SharePoint permissions early: Make sure your Microsoft 365 account can upload into the intended site/library and create folders where needed. Permission gaps are a classic reason migrations “half succeed.”
- Choose a method that matches your operational reality: Manual uploads and rclone jobs depend on your machine and network stability. If you don’t want a workstation acting as a transfer engine, a cloud-run transfer can be a better fit.
The smoothest migrations are the ones that treat SharePoint as the destination it actually is: a structured workspace with governance rules, not merely “another folder.” Pick a method that fits how you work, and the move from FTP/SFTP feels far less dramatic.
FTP/SFTP to SharePoint Migration FAQ
Step-by-Step Video: Transfer FTP / SFTP Files to SharePoint
If you prefer learning visually, this video walks you through how to transfer files from FTP or SFTP servers to Microsoft SharePoint. You’ll see how to connect your FTP/SFTP source, choose SharePoint as the destination, set up schedules, apply file filters, and complete the entire migration without downloading files locally. It’s simple, efficient, and ideal for both personal and business data transfers.
Conclusion
Migrating from FTP or SFTP to SharePoint is less a technical upgrade than an operational one. It shifts files out of isolated transfer endpoints and into a workspace where collaboration, access control, and compliance are handled consistently. Instead of pulling files down to a local computer and re-uploading them, teams can move data directly in the cloud. With [Cloudslinker](https://www.cloudslinker.com), files are transferred straight from FTP or SFTP servers into SharePoint without local downloads or long-running desktop processes. Folder structures remain intact, transfers continue even if your computer is offline, and large datasets can move steadily without tying up bandwidth. For organizations ready to modernize file workflows while keeping disruption low, transferring files from FTP/SFTP to SharePoint using Cloudslinker provides a practical, hands-off approach — no downloads required.
Online Storage Services Supported by CloudsLinker
Transfer data between over 48 cloud services with CloudsLinker

OneDrive

Google Drive

Google Photos

Shared Drive

OneDrive for Business

Dropbox

Box

Mega

pCloud

Yandex

ProtonDrive

AWS

GCS

iDrive

Storj

DigitalOcean

Wasabi

1fichier

PikPak

TeleBox

OpenDrive

Backblaze B2

Fastmail file

SharePoint

Nextcloud

ownCloud

Premiumize me

HiDrive

Put.io

Sugar Sync

Jottacloud

Seafile

Ftp

SFtp

NAS

WebDav

4shared

Icedrive

Cloudflare R2

Scaleway

Doi

iCloud Drive

iCloud Photos

FileLU

Zoho WorkDrive

Telia Cloud / Sky

Drime

Filen
Didn' t find your cloud service? Be free to contact: [email protected]
Further Reading
Effortless FTP connect to google drive: Transfer Files in 3 Easy Ways
Learn More >
Google Photos to OneDrive: 3 Innovative Transfer Strategies
Learn More >
Google Photos to Proton Drive: 3 Effective Transfer Techniques
Learn More >