Moving Files from Google Drive to Drime: Practical Options That Actually Work
Migrating data from Google Drive to Drime doesn’t have to mean juggling downloads or dealing with slow uploads. Depending on how much data you’re moving and how hands-on you want to be, there are several proven ways to handle the transition efficiently — from basic browser-based methods to fully automated cloud transfers.
Introduction
As privacy-focused collaboration platforms continue to evolve, Drime has attracted users looking for a modern workspace that blends encrypted storage with productivity tools. When preparing to move files out of Google Drive and into Drime, the right approach depends less on buzzwords and more on practical factors: data volume, time constraints, and how much manual effort you’re willing to invest. Some users only need to move a few documents or shared folders, while others may be migrating years of archived data or team resources. In the sections that follow, we’ll walk through several dependable ways to transfer files from Google Drive to Drime — covering everything from simple manual exports to fully managed cloud-based workflows. Each option comes with its own balance of speed, reliability, and control, helping you choose a path that fits your real-world use case.
Google Drive is a core part of Google’s cloud ecosystem, widely adopted for document storage, collaboration, and real-time editing. It’s commonly used by individuals, teams, and organizations that rely on shared folders and tight integration with Google Docs, Sheets, and Slides. New accounts include 15 GB of shared storage, with additional capacity available through paid plans.
- Multi-device access: Available on the web, desktop, Android, and iOS.
- Real-time collaboration: Multiple users can edit the same files simultaneously.
- Extensive integrations: Works with thousands of third-party apps and services.
- Automatic syncing: Desktop clients keep selected folders updated in the background.
- Large file support: Suitable for handling sizable documents and media files.
Drime is a European-built cloud workspace that blends secure file storage with modern collaboration tools. Rather than focusing purely on office documents, Drime positions itself as a private, all-in-one environment for teams and individuals who want control over their data while still collaborating efficiently.
- End-to-end encryption: Files are protected throughout storage and sharing.
- Privacy-oriented design: Built with GDPR compliance and data protection in mind.
- Collaboration features: Shared workspaces, comments, and previews.
- Cross-platform access: Web interface plus desktop and mobile support.
- Balanced approach: Combines secure storage with day-to-day teamwork needs.
While both platforms offer cloud-based file storage, they serve slightly different priorities. Google Drive is optimized for productivity workflows within Google’s ecosystem, whereas Drime emphasizes privacy, controlled collaboration, and data residency considerations. This distinction often influences how users approach migration.
| Aspect | Google Drive | Drime |
|---|---|---|
| Primary Focus | Collaboration within Google Workspace | Secure collaboration and private storage |
| Data Protection | Server-managed encryption | End-to-end encrypted storage |
| Platform Integration | Deep Google ecosystem integration | Independent, privacy-first workspace |
| Third-Party Automation | Wide API and app support | Focused on controlled sync and sharing |
| Typical Users | Teams relying on Google Docs | Teams prioritizing privacy and data ownership |
If your goal is to reduce reliance on large productivity ecosystems while maintaining collaboration, moving from Google Drive to Drime can be a strategic shift rather than a simple storage change.
Before transferring anything, it’s worth reviewing what currently lives in your Google Drive. Identify outdated folders, duplicated files, and shared content you may not need anymore. Knowing the total data size also helps you decide whether a simple upload or a more automated transfer is the better option.
On the Drime side, confirm that your workspace is ready. Test folder creation, file uploads, and sharing permissions through the web dashboard or desktop app. For larger migrations, starting with a small test folder can help validate performance and structure before committing to the full move.
Organizing your data in advance — renaming files, simplifying folder hierarchies, and choosing a transfer method early — can prevent unnecessary rework. Some users export data manually, others rely on command-line tools for precision, while many prefer browser-based automation with CloudsLinker to handle cloud-to-cloud transfers without local downloads. A bit of preparation goes a long way toward a clean and predictable migration.
Method 1: Manually Download and Upload Files via the Web
Step 1: Download Files from Google Drive
Start by opening the
Google Drive web
interface
and signing in to the account where your files are stored. Navigate through your folders and select
the
documents or directories you want to move. To pick multiple items at once, hold
Ctrl on Windows or Command on macOS while clicking.
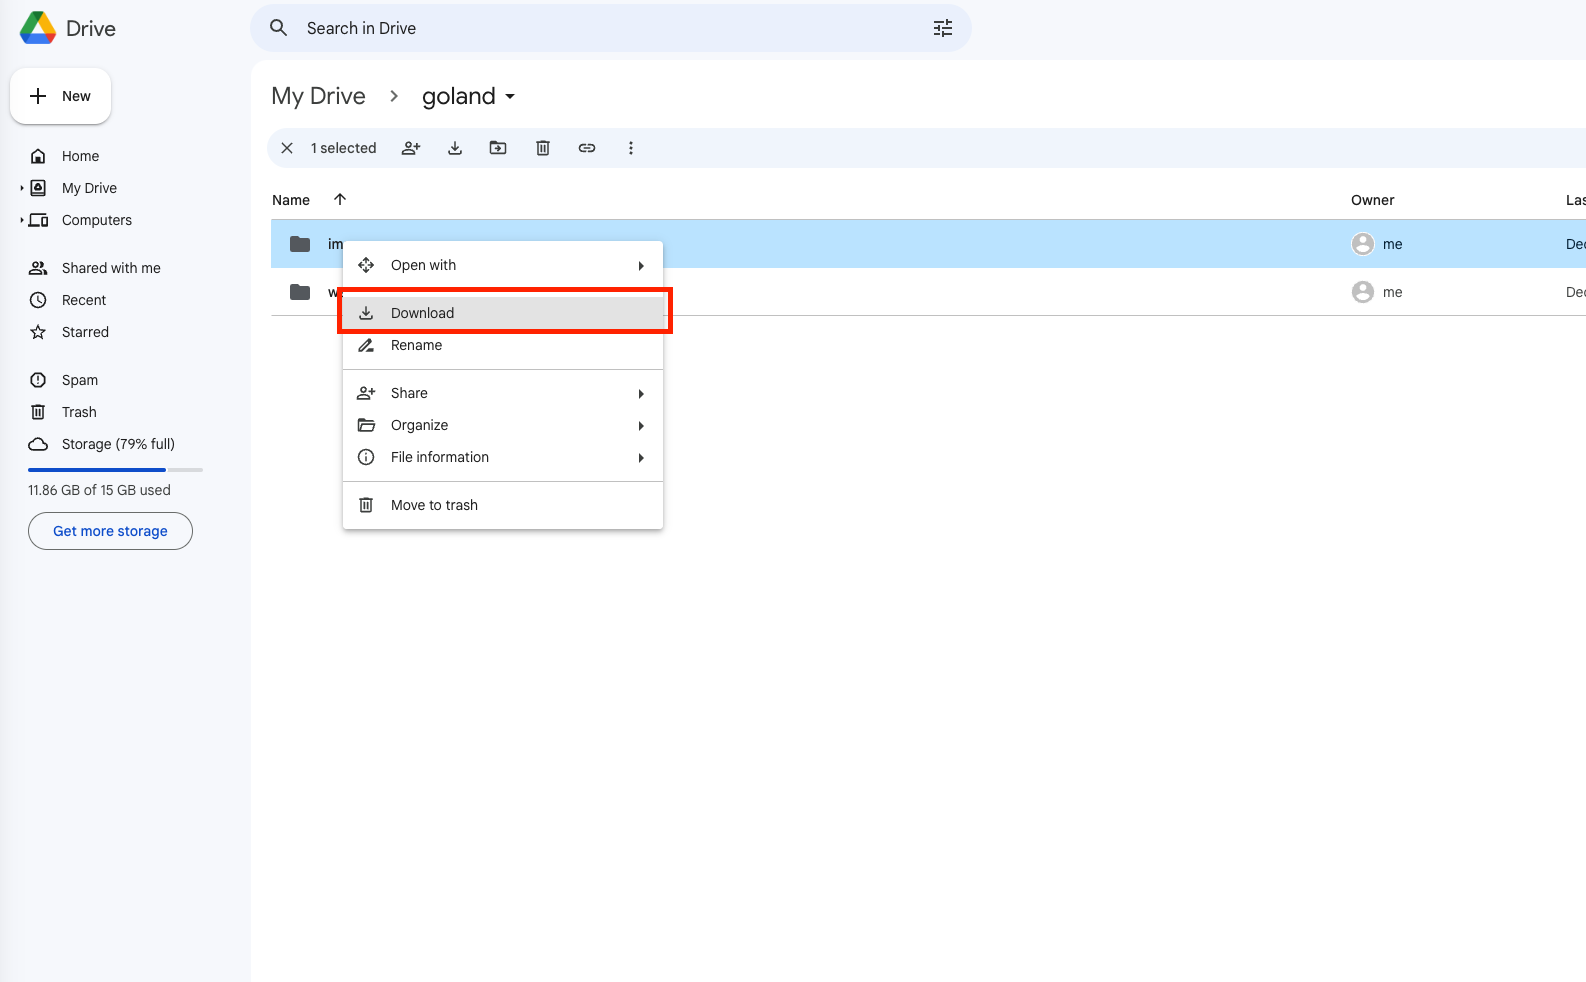
After selecting your files, right-click and choose Download. Google Drive will compress folders into a ZIP file automatically. Once the download completes, unzip the archive on your computer so the original folder structure is preserved for the upload step.
Step 2: Upload Files to Drime
Next, open the Drime web dashboard and log in to your account. Choose the destination folder where your Google Drive data should live, or create a new folder to keep the imported files organized from the start.
You can now upload the extracted files by dragging and dropping them directly into the browser window, or by using Drime’s upload option to select files and folders manually. The upload runs entirely through your browser, making this approach straightforward and easy to follow.
This manual method is best suited for smaller transfers, occasional migrations, or users who prefer to stay in full control of each step. If you’re dealing with a large Google Drive library or want to avoid repeated downloads and uploads, more automated solutions — such as command-line tools or browser-based cloud transfer services — are typically more efficient for handling large volumes of data.
Method 2: Export Your Drive with Google Takeout, Then Upload to Drime
Step 1: Generate a Google Drive Archive via Google Takeout
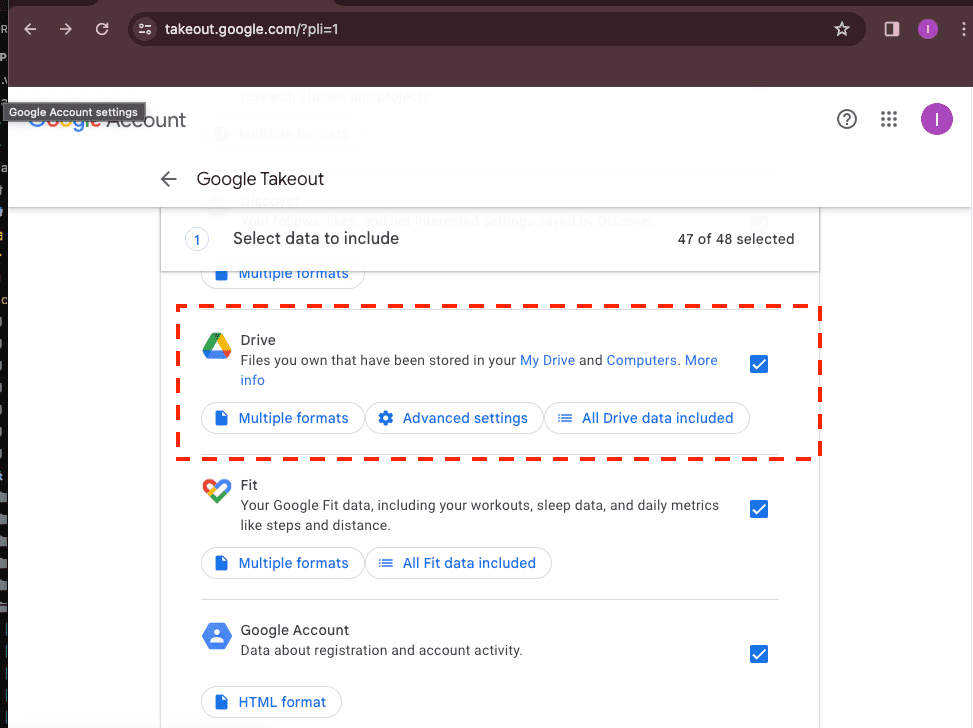
If your priority is to keep a full offline copy of your Google Drive before migrating anything, Google Takeout offers the most structured approach. After signing in, choose “Deselect all” and enable only Google Drive. This allows you to export everything at once or limit the export to specific folders if you don’t need your entire Drive.
Once submitted, Google begins preparing one or more downloadable archives, typically delivered as ZIP files. The waiting time varies — smaller accounts may be ready quickly, while larger Drives can take several hours to process. When the export is complete, download the files and extract them locally so your original folder hierarchy remains intact.
Step 2: Upload the Archived Files to Drime
After extracting the Takeout archives, open the Drime web interface and sign in. Navigate to the folder where you want the imported files to live, or create a new directory dedicated to this migration to keep things organized.
Upload the extracted folders either by dragging them directly into the browser window or by using Drime’s file upload controls. Because the process runs entirely through the browser, it’s easy to monitor progress and verify that files arrive as expected.
This approach is especially useful if you want a verified local backup, plan to reorganize files before uploading, or prefer a clear break between your old and new storage platforms. That said, Takeout exports can become cumbersome for very large datasets. When uploads start to feel slow or repetitive, more automated solutions — such as command-line tools or cloud-based transfer services like CloudsLinker — are often a better fit for handling large volumes efficiently.
Method 3: Automated Cloud-to-Cloud Transfer Using CloudsLinker
Overview: Transfer Files from Google Drive to Drime — Fully Cloud-Based
CloudsLinker enables direct transfers between cloud storage services without downloading files to your computer. The entire process runs on remote servers, allowing long-running tasks to continue even after you close your browser. It supports dozens of cloud platforms, including Google Drive and Drime.
Step 1: Sign In and Connect Google Drive
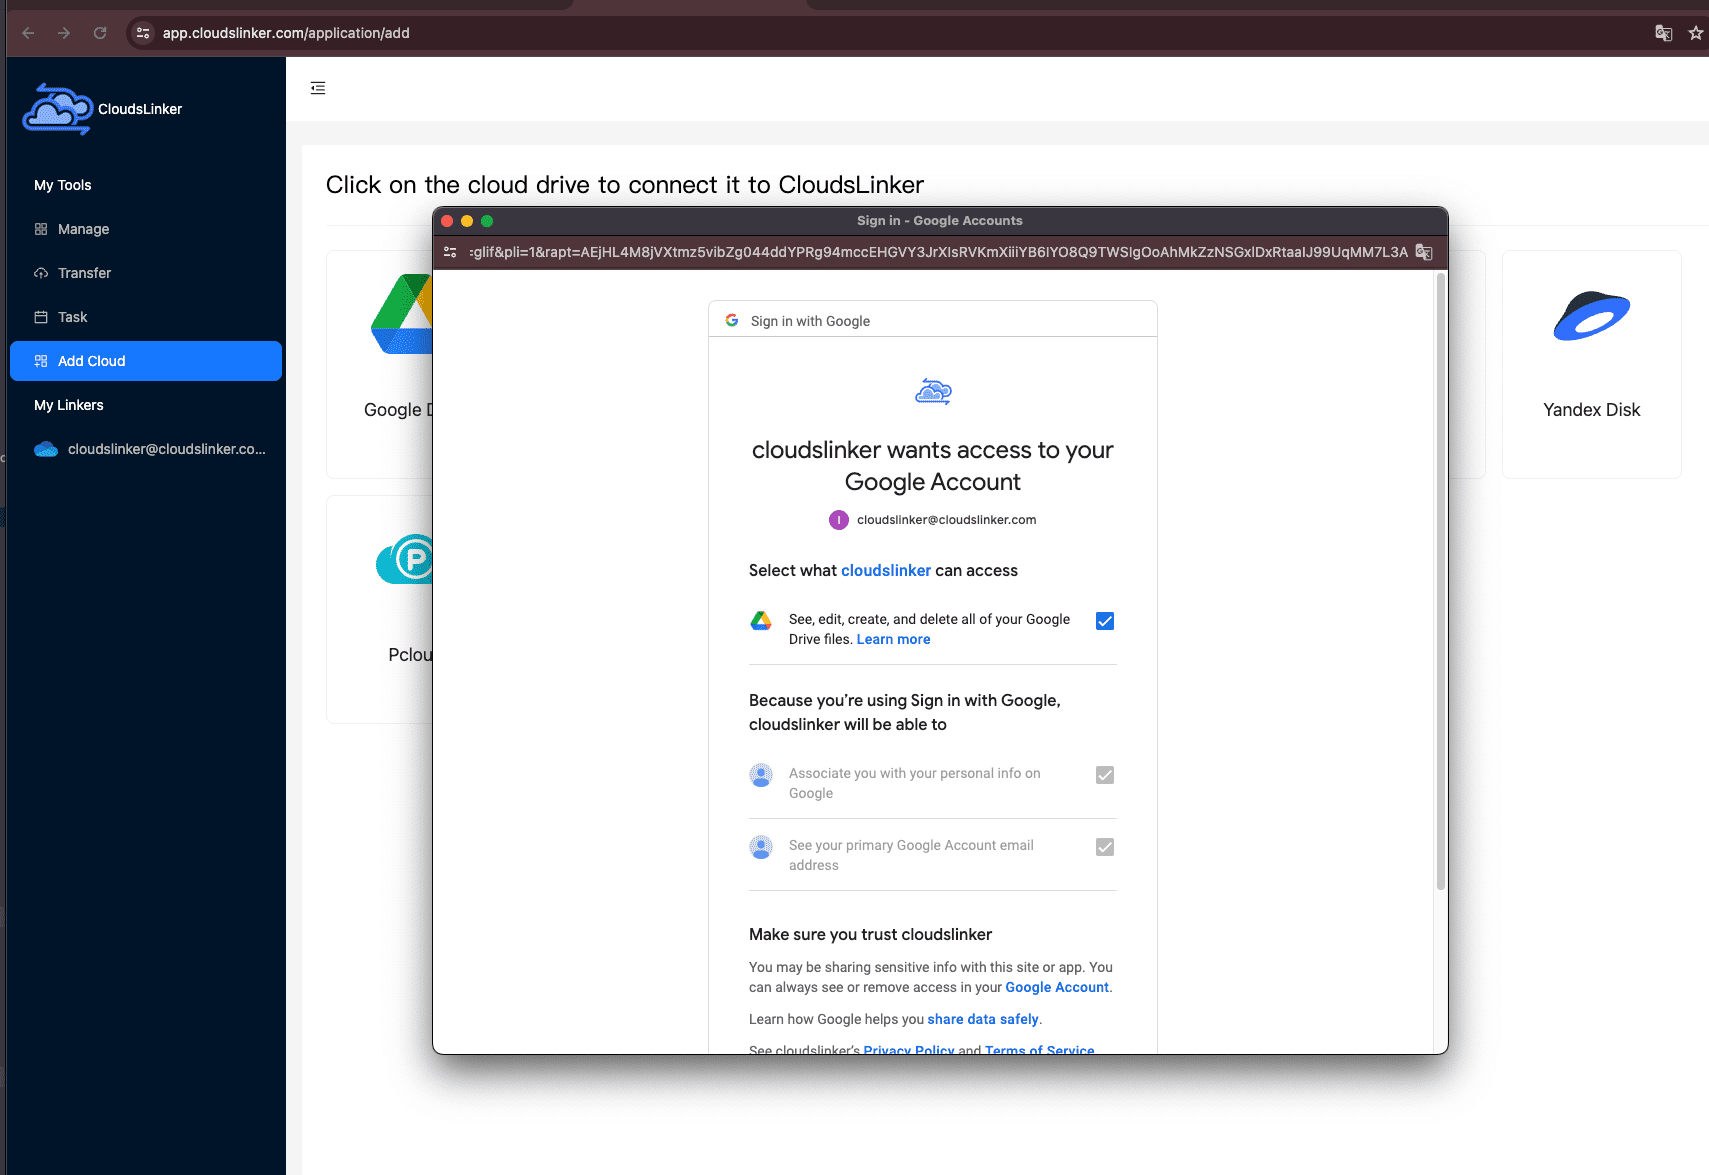
Visit app.cloudslinker.com and log in to your account. New users can complete registration in just a few moments. From the dashboard, click Add Cloud and select Google Drive as your source storage.
You’ll be redirected to Google’s official authorization screen to approve access. Once confirmed, your Google Drive will appear in CloudsLinker and can be used as a transfer source.
Step 2: Add Drime Using an Authorization Token
To connect Drime as the destination, you’ll need to generate an access token from the Drime dashboard. Log in to the Drime website, open Settings, then navigate to Developer. From there, generate a new authorization token.
Copy the generated token and return to CloudsLinker. Click Add Cloud, choose Drime, and paste the token into the authorization field. This token-based approach allows secure, controlled access without sharing your account password.

Step 3: Configure the Transfer Task
Open the Transfer section and select Google Drive as the source. Browse and choose the files or folders you want to migrate. On the destination side, select your connected Drime account and specify the target folder.

CloudsLinker provides optional filters such as file type exclusions, date-based rules, and selective folder transfers. These options are useful if you want to move only active projects instead of your entire Drive.
Step 4: Run the Task and Track Progress
Start the transfer and monitor its status from the Task List. You can view progress, transfer speed, completed file counts, and estimated remaining time. Once started, tasks continue running on the server even if you close your browser or shut down your computer.
After completion, a detailed summary report highlights successful transfers and flags any items that require attention. Your files will now be available in Drime, organized according to the destination structure you selected.
For users who want a hands-off migration — without relying on local bandwidth, browser stability, or overnight downloads — CloudsLinker offers a reliable and scalable way to move data from Google Drive to Drime.
Moving Data Between Other Cloud Platforms?
Beyond Google Drive and Drime, CloudsLinker supports many other cloud services, including OneDrive, Dropbox, MEGA, WebDAV, and S3-compatible storage. All transfers run entirely cloud-to-cloud, allowing you to automate migrations without tying up your local system.
Comparing 3 Practical Ways to Move Files from Google Drive to Drime
Migrating data from Google Drive to Drime is less about finding a “best” method and more about choosing the approach that matches your workload. Some users only need to move a handful of folders once, while others are relocating entire Drive archives into a more privacy-controlled workspace. The three options below cover the most common real-world scenarios.
| Approach | Setup Effort | Transfer Speed | Ideal Use Case | Uses Your Bandwidth | Technical Skill |
|---|---|---|---|---|---|
| Manual Browser Download & Upload | ★★★★★ | ★★★☆☆ | Small one-off moves, selective folders | Yes | Beginner |
| Google Takeout + Web Upload | ★★★★☆ | ★★☆☆☆ | Full exports, offline backups, pre-migration cleanup | Yes | Beginner |
| CloudsLinker (Cloud-to-Cloud) | ★★★★★ | ★★★★★ | Large libraries, unattended transfers, repeat migrations | No | Beginner |
For quick, lightweight moves, manual browser uploads are usually sufficient. If you want a full offline snapshot of your Drive before uploading anything to Drime, Google Takeout provides a structured export path. When data volume grows or you prefer not to rely on your local machine, CloudsLinker is often the most efficient choice since transfers run entirely in the cloud.
While transferring files into Drime is generally straightforward, a small amount of preparation can prevent failed uploads, missing content, or unnecessary repetition:
- Check file readiness: Make sure all Google Drive files are fully accessible and not limited to placeholder or streaming-only states before exporting.
- Decide on folder structure early: Planning how files should appear inside Drime saves time re-organizing large uploads later.
- Prepare Drime access: If using third-party tools, generate and store your Drime developer token securely before starting the migration.
- Understand local constraints: Browser-based uploads depend heavily on your network stability and device uptime.
- Run a test transfer: Start with a small folder to verify filenames, permissions, and overall structure.
- Plan for scale: Large libraries benefit from methods that support resumable, long-running transfers.
Whether you’re moving personal files or years of archived project data, understanding how Google Drive exports data and how Drime handles uploads will make the transition more predictable.
Frequently Asked Questions
Step-by-Step Video: Transfer Files from Google Drive to Drime
This video walks through the process of transferring files from Google Drive to Drime using a cloud-based approach. You’ll see how to connect Google Drive, generate a Drime authorization token, configure transfer options, and complete the migration without downloading or uploading files locally.
Conclusion
No single method fits every Google Drive to Drime migration. Small, one-off transfers can be handled manually without much planning. Desktop-based sync tools make sense if you want ongoing access and local control. Power users who prefer automation may lean toward command-line solutions, while teams or individuals moving large datasets often benefit from browser-based, server-side transfers that run independently of their own connection. Whichever route you take, it’s worth starting with a limited test run before committing to a full migration. A bit of preparation up front can save hours later — and make the move into Drime’s collaborative environment far smoother.
Online Storage Services Supported by CloudsLinker
Transfer data between over 48 cloud services with CloudsLinker

OneDrive

Google Drive

Google Photos

Shared Drive

OneDrive for Business

Dropbox

Box

Mega

pCloud

Yandex

ProtonDrive

AWS

GCS

iDrive

Storj

DigitalOcean

Wasabi

1fichier

PikPak

TeleBox

OpenDrive

Backblaze B2

Fastmail file

SharePoint

Nextcloud

ownCloud

Premiumize me

HiDrive

Put.io

Sugar Sync

Jottacloud

Seafile

Ftp

SFtp

NAS

WebDav

4shared

Icedrive

Cloudflare R2

Scaleway

Doi

iCloud Drive

iCloud Photos

FileLU

Zoho WorkDrive

Telia Cloud / Sky

Drime

Filen
Didn' t find your cloud service? Be free to contact: [email protected]
Further Reading
Effortless FTP connect to google drive: Transfer Files in 3 Easy Ways
Learn More >
Google Photos to OneDrive: 3 Innovative Transfer Strategies
Learn More >
Google Photos to Proton Drive: 3 Effective Transfer Techniques
Learn More >