SharePoint to OneDrive: Move Files into Personal Storage You Own
Move files from SharePoint to OneDrive using four methods: native Move to, desktop sync, Migration Manager, and cloud-to-cloud transfer with CloudsLinker.
Introduction
A finished project leaves files behind, and not all of them should stay in a shared SharePoint site. OneDrive gives each person private storage tied to their own account, which is where the documents you personally own belong once a team site is headed for archival or restructuring. SharePoint libraries center on collective ownership — access follows the site's permissions, so old files can become hard to reach after a site changes hands. Moving the relevant documents into OneDrive keeps them under your control, reachable through File Explorer and the Microsoft 365 apps you already use. The methods below cover the move, from Microsoft's built-in Move option to a transfer that runs in the cloud.
Microsoft SharePoint stores team files in document libraries attached to sites. Access is governed at the site, library, and item level, which suits shared, organization-wide content.
- Team-owned libraries: Content belongs to a site rather than one person.
- Permission inheritance: Access follows site and library settings.
- Versioning and metadata: Tracks revisions and custom columns.
- Microsoft 365 integration: Connected to Teams and the Office apps.
- Governance: Retention, auditing, and compliance controls.
OneDrive is Microsoft's personal cloud storage. Each account holds files tied to one user, with 5 GB free or 1 TB on most Microsoft 365 plans.
- Personal ownership: Files follow your account, not a team site.
- File Explorer access: Integrated into Windows and available on macOS.
- Personal Vault: A protected area for sensitive documents.
- Office integration: Opens and saves directly from the Office apps.
- Version history: Keeps earlier versions of stored files.
SharePoint and OneDrive both belong to Microsoft 365 and share the same underlying storage engine, but they differ in ownership. SharePoint holds shared, site-bound content; OneDrive holds personal files attached to one account.
| Feature | Microsoft SharePoint | OneDrive |
|---|---|---|
| Ownership | Team or site | Individual user |
| Access Model | Site and library permissions | Account owner plus shared links |
| Typical Use | Collaborative, governed projects | Personal working files |
| Default Capacity | 1 TB per site plus add-ons | 1 TB on most Microsoft 365 plans |
| Built-in Move | Move to / Copy to within tenant | Move to / Copy to within tenant |
| Survives Site Archival | Tied to site lifecycle | Tied to your account |
Moving files from a team site to personal storage usually comes down to ownership and lifecycle. Common reasons:
- Keep files past a project's end: Documents you own stay reachable even after the SharePoint site is archived or deleted.
- Personal ownership: Access follows your account instead of shifting site permissions.
- Cleaner handover: Separating personal working files from shared team content before changing roles.
- Personal Vault: A protected space for sensitive files that a shared library does not offer.
- Same ecosystem: Files stay inside Microsoft 365, so Office and File Explorer behave exactly as before.
With the destination settled, the method depends on whether both accounts live in the same tenant and how much data you are moving.
Confirm whether the source SharePoint site and the target OneDrive belong to the same Microsoft 365 organization. If they do, the built-in Move option is available. If they are in different tenants, plan for a cloud-to-cloud transfer instead, since Microsoft's native commands do not cross tenant boundaries.
Decide which files are genuinely yours to take. A team library often mixes shared resources with personal drafts, and moving shared content out can disrupt colleagues. Select only the folders you own or are responsible for.
Check your OneDrive capacity against the size of the selection. Personal accounts start at 5 GB, while Microsoft 365 plans usually include 1 TB. For large transfers, tools like Migration Manager or CloudsLinker handle volume better than manual moves.
Method 1: Built-in Move to or Copy to (Same Tenant)
Step 1: Select Files in the SharePoint Library
Open the SharePoint document library and select the files or folders you want. From the command bar or the right-click menu, choose Move to or Copy to. Move removes the items from SharePoint; Copy leaves the originals in place.
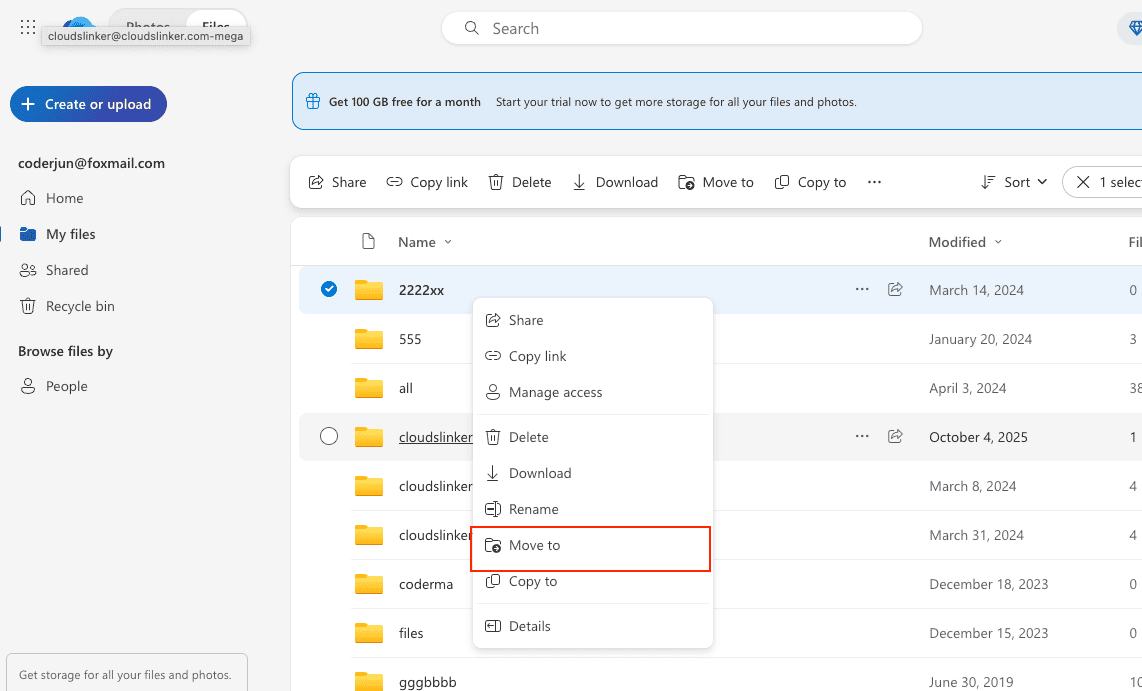
Step 2: Choose Your OneDrive as the Destination
In the destination picker, select Your OneDrive and browse to the target folder. Confirm to start the transfer. Within the same tenant, Move to preserves version history, and the files appear in OneDrive under your account.
This is the most direct method when both ends sit in one Microsoft 365 organization. It is best for a manageable number of files; very large selections can hit per-operation limits, and it is not available across separate tenants.
Method 2: Sync Both Locations to the Desktop
Step 1: Sync the SharePoint Library and OneDrive
On the SharePoint library, click Sync to add it to File Explorer or Finder through the OneDrive client. Your personal OneDrive already appears there once the client is signed in. Set the SharePoint folders to download fully rather than stay online-only.

Step 2: Move Files Between the Folders
Drag the files from the synced SharePoint folder into your OneDrive folder. The client uploads them to your personal storage and removes them from the SharePoint library if you move rather than copy. Wait for the sync icons to confirm completion before closing.
This works without admin tools and suits a hands-on move of moderate size. It uses local disk space and bandwidth while files pass through your machine, and version history is not carried over.
Method 3: Microsoft Migration Manager (Admins)
Step 1: Open Migration Manager
Administrators can use Migration Manager in the SharePoint admin center to move content between Microsoft 365 locations at scale. It is designed for bulk jobs across many users and sites rather than a single folder.
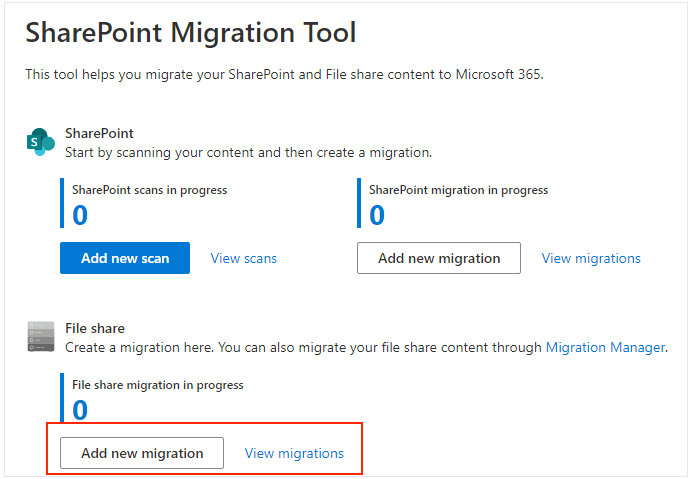
Step 2: Define Source and Destination
Add the SharePoint library as the source and the target OneDrive as the destination, then schedule and run the migration. Migration Manager reports per-item status and handles retries, which is useful for large or repeated moves.
This method requires administrator access and tenant permissions, so it is not available to a standard user moving their own files. For individual transfers, the built-in Move option or a cloud-to-cloud service is simpler.
Method 4: Cloud-to-Cloud Transfer with CloudsLinker
Transfer Without Local Downloads
CloudsLinker moves files directly between cloud accounts, including across separate Microsoft 365 tenants. Nothing routes through your computer, and the task continues after you close the browser. It connects to 40+ services, including SharePoint and OneDrive.
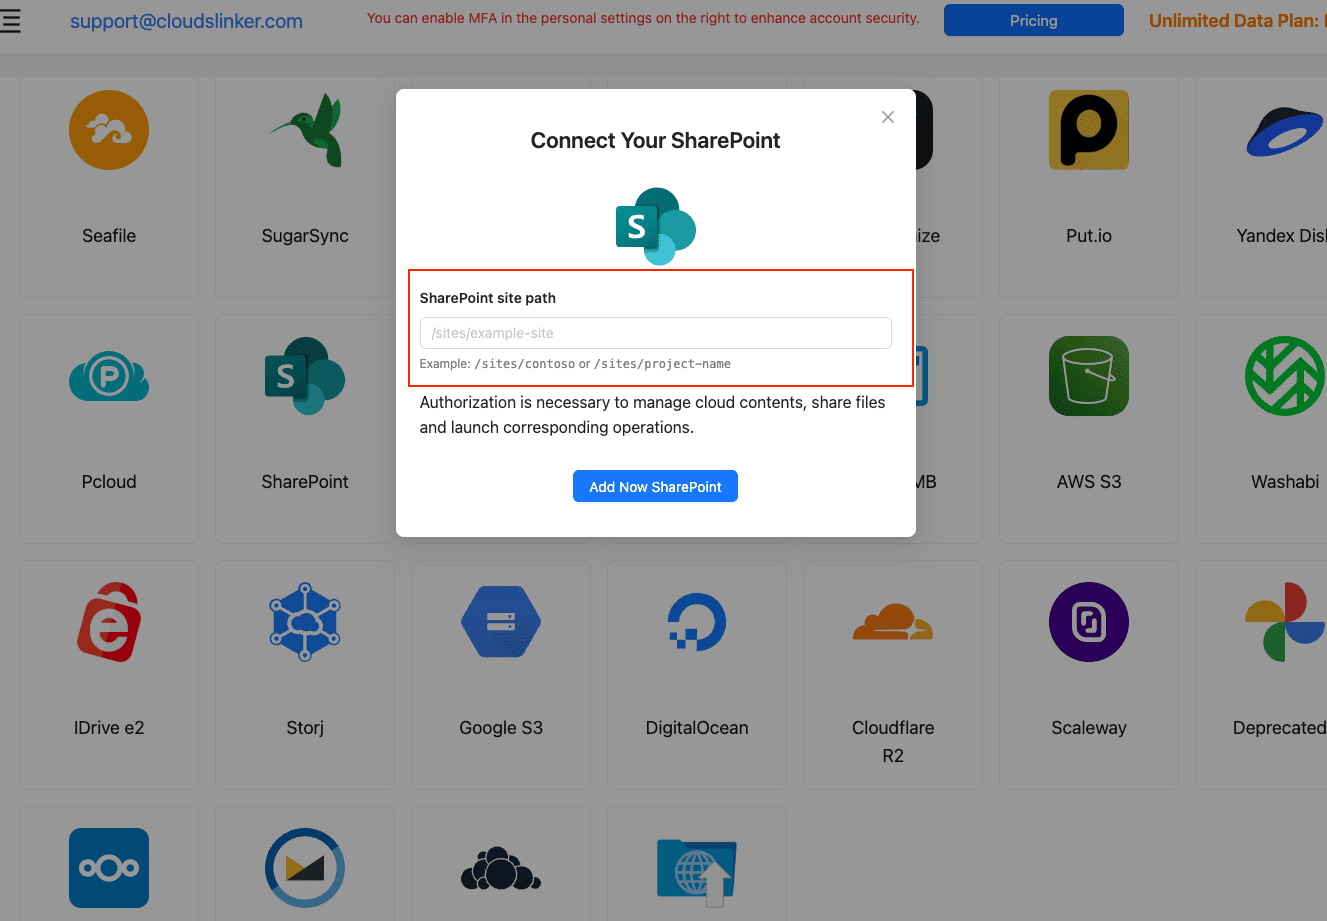
Step 1: Connect SharePoint
Sign in at app.cloudslinker.com, click Add Cloud, and select SharePoint. Enter the site path, for example /sites/yoursite, then authorize through Microsoft and choose the document library if asked.
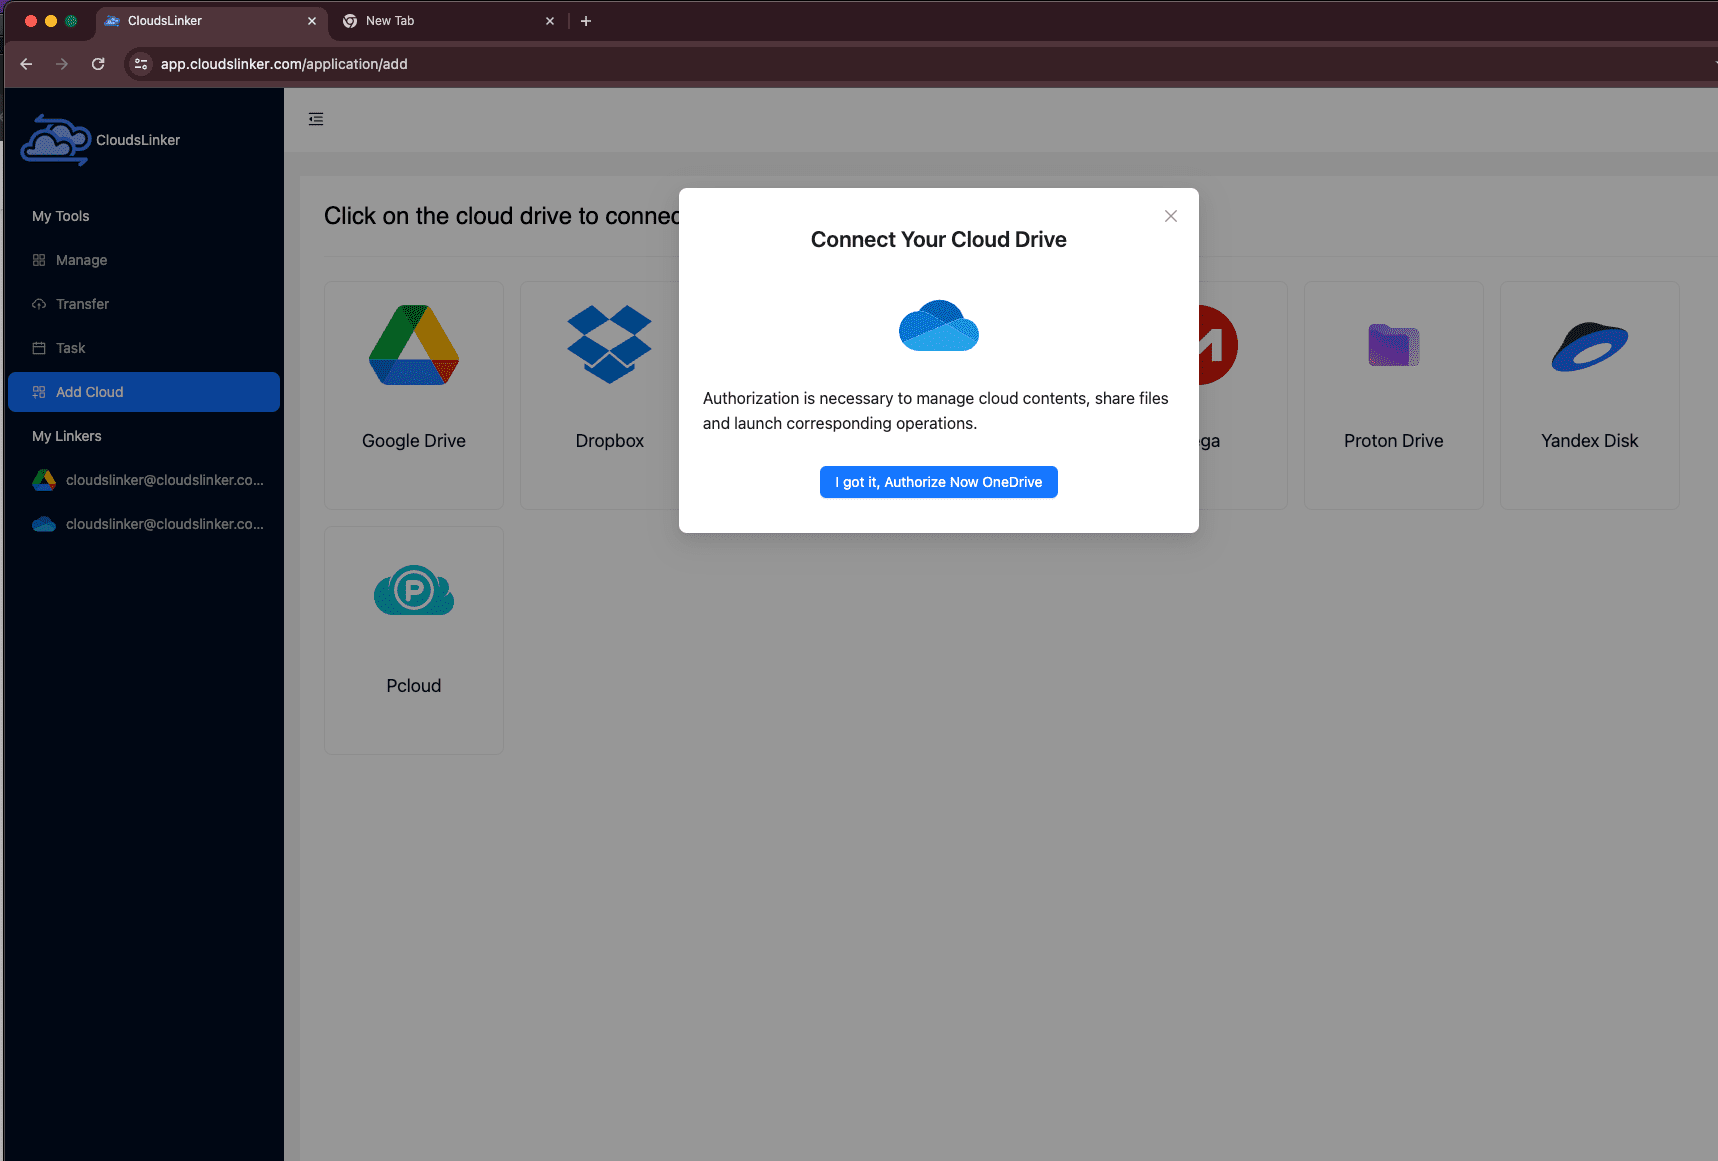
Step 2: Connect OneDrive
Click Add Cloud again and select OneDrive. Approve access through Microsoft. If your account exposes more than one drive, select the one you want as the destination.
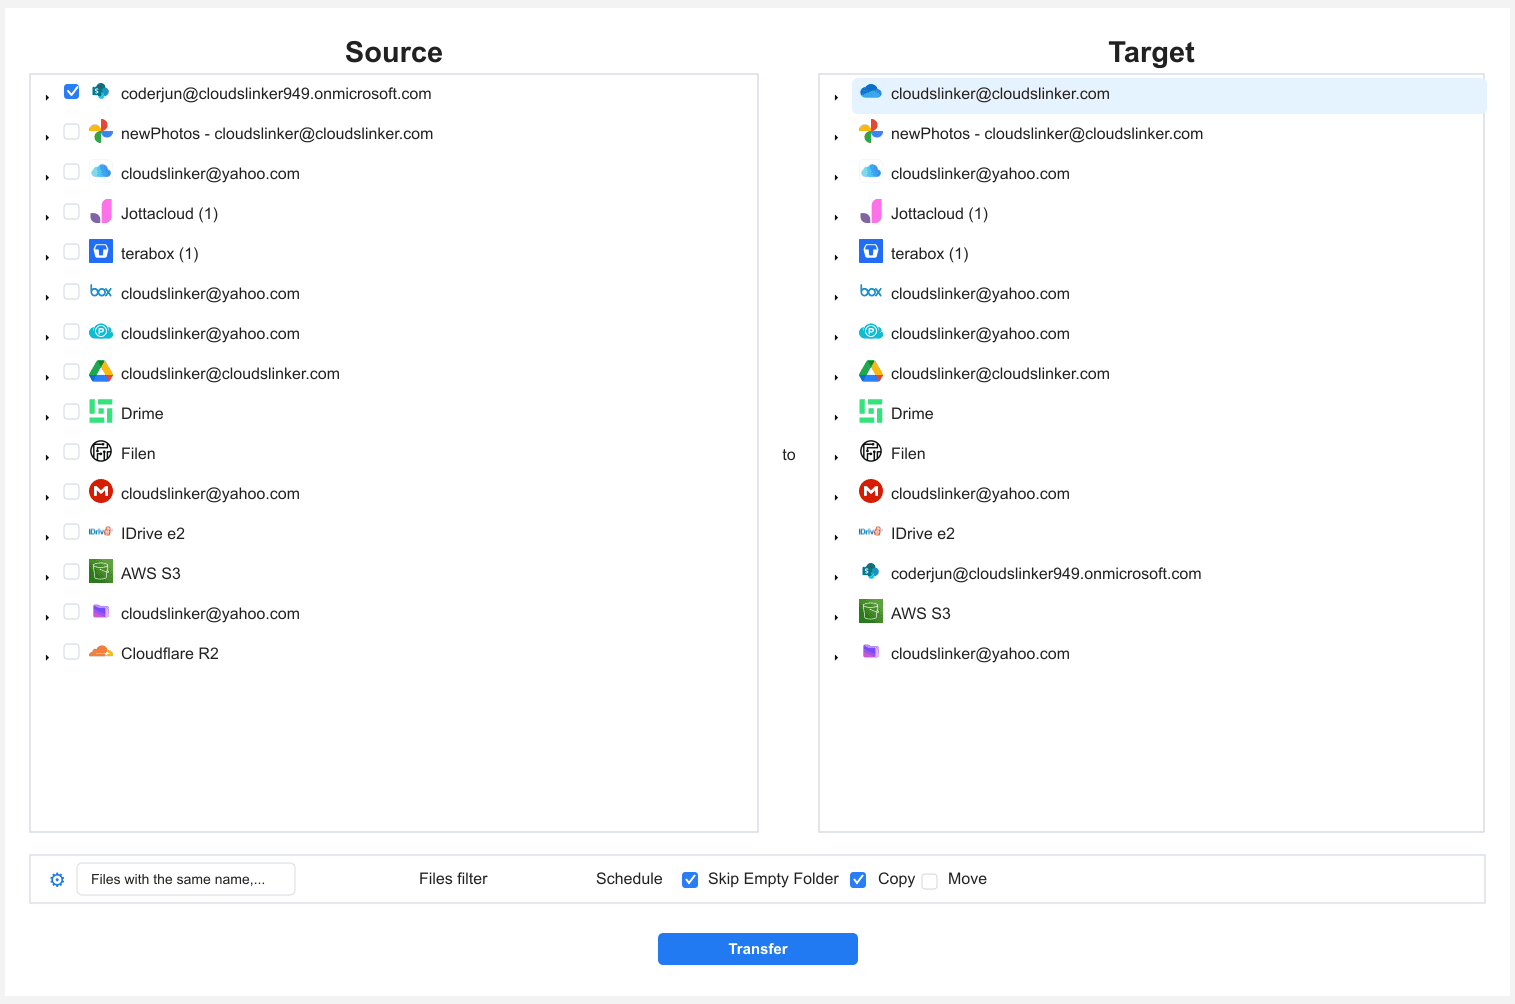
Step 3: Configure the Transfer
Open the Transfer section. Select SharePoint as the source and browse to the folders you own, then select OneDrive and choose the destination folder.
Filters limit the move to certain file types or a date range, and Copy or Move mode controls whether the SharePoint originals remain.
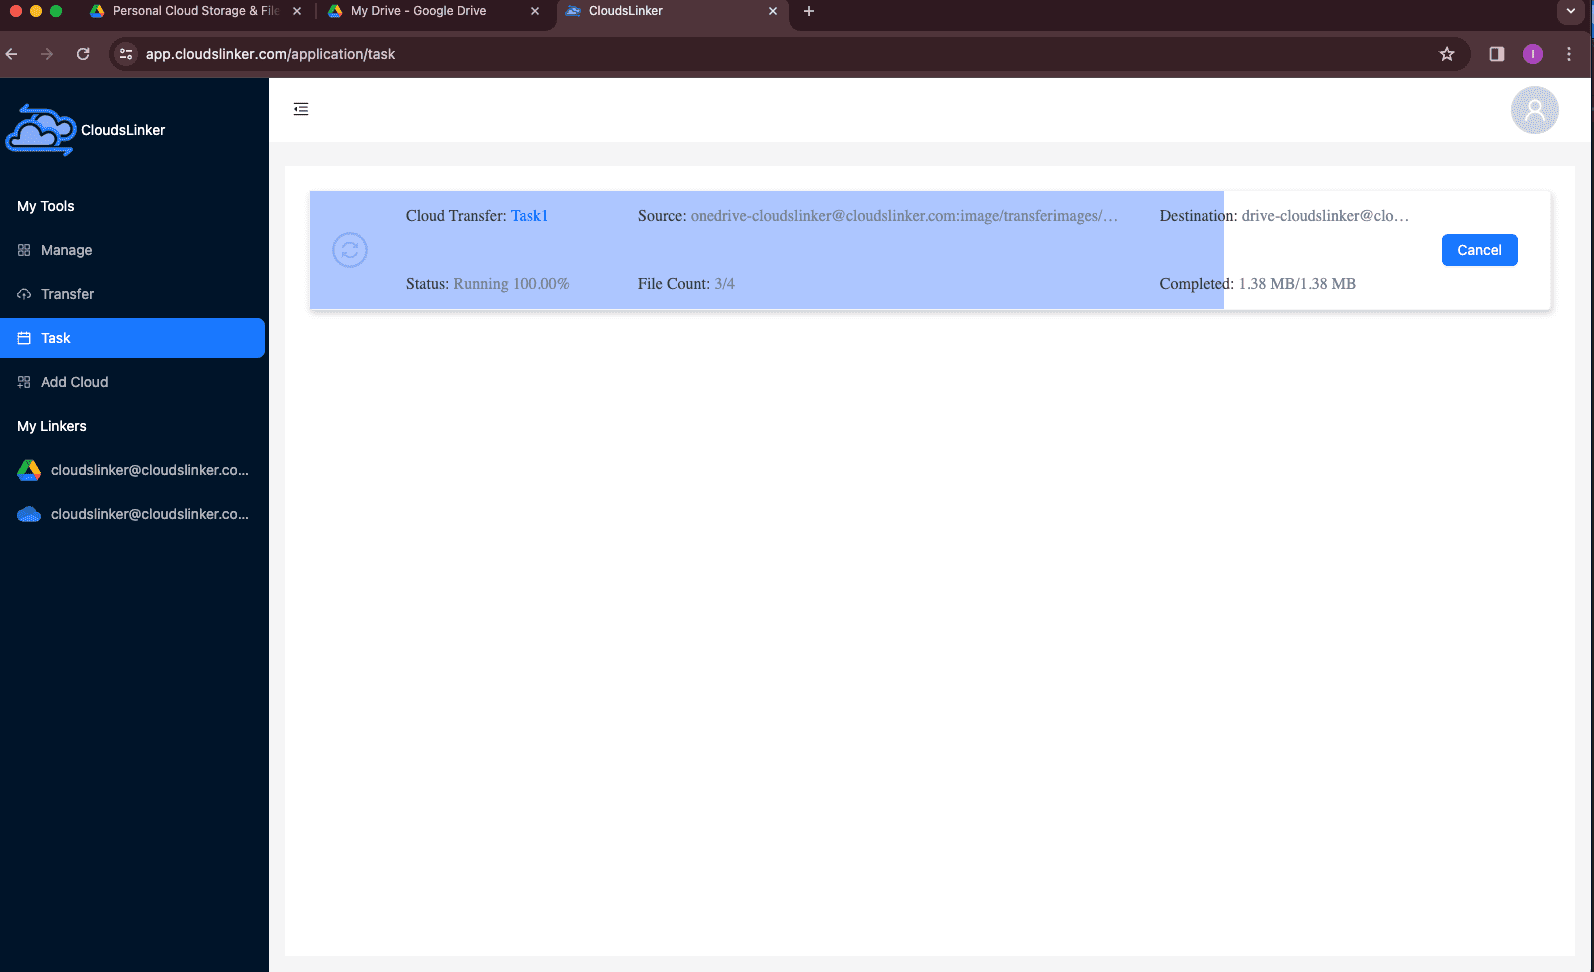
Step 4: Start and Monitor the Transfer
Start the task and track it in the Task List, which shows transferred size, speed, and any skipped items. The transfer runs in the cloud, so you can close the browser and check the summary later.
Comparing the Ways to Transfer From SharePoint to OneDrive
| Method | Ease of Use | Speed | Best For | Crosses Tenants | Skill Level |
|---|---|---|---|---|---|
| Move to / Copy to | ★★★★★ | ★★★★☆ | Same-tenant folders, keeps versions | No | Beginner |
| Desktop Sync | ★★★★☆ | ★★★☆☆ | Hands-on moves of moderate size | Manual | Beginner |
| Migration Manager | ★★★☆☆ | ★★★★☆ | Admin bulk migrations | Within tenant | Advanced |
| CloudsLinker | ★★★★★ | ★★★★★ | Cross-tenant or large, hands-off moves | Yes | Beginner |
Inside one tenant, the built-in Move option is the quickest route and keeps version history. For administrators, Migration Manager scales to many users. When the move spans tenants or you want it to run without your machine, CloudsLinker handles it server-side.
- Confirm the tenant boundary first: Move to and Copy to only work inside one organization; a cross-tenant move needs a cloud-to-cloud service.
- Take only what you own: Moving shared team files out of a library can break links and access for colleagues.
- Use Copy to test: Copy first, verify the files in OneDrive, then delete from SharePoint to avoid losing anything.
- Mind version history: Only the native Move keeps versions; other methods bring the current file. Export critical history separately if you need it.
- Check OneDrive capacity: Compare the selection size to your 5 GB or 1 TB allowance before a large move.
- Watch for sync conflicts: With desktop sync, let one folder finish before moving the next to avoid duplicate or conflicted copies.
Frequently Asked Questions
Conclusion
The simplest path stays inside Microsoft 365: the built-in Move to or Copy to option handles a folder or two in the same tenant without extra tools. Desktop sync helps when you prefer working in File Explorer. Administrators moving many users at once have Migration Manager. When the move crosses tenants, involves large volumes, or you want it to run without your machine, CloudsLinker handles it server-side. Choose by tenant boundary, scale, and how much you want to manage by hand.
Online Storage Services Supported by CloudsLinker
Transfer data between over 50 cloud services with CloudsLinker

OneDrive

Google Drive

Google Photos

Shared Drive

OneDrive for Business

Dropbox

Box

Mega

pCloud

Yandex

ProtonDrive

AWS

GCS

iDrive

Storj

DigitalOcean

Wasabi

1fichier

PikPak

TeleBox

OpenDrive

Backblaze B2

Fastmail file

SharePoint

Nextcloud

ownCloud

Premiumize me

HiDrive

Put.io

Sugar Sync

Jottacloud

Seafile

Ftp

SFtp

NAS

WebDav

4shared

Icedrive

Cloudflare R2

Scaleway

Doi

iCloud Drive

iCloud Photos

FileLU

Zoho WorkDrive

Telia Cloud / Sky

Drime

Filen

TeraBox

Internxt
Didn' t find your cloud service? Be free to contact: [email protected]
Further Reading
Effortless FTP connect to google drive: Transfer Files in 3 Easy Ways
Learn More >
Google Photos to OneDrive: 3 Innovative Transfer Strategies
Learn More >
Google Photos to Proton Drive: 3 Effective Transfer Techniques
Learn More >