Moving Your Photo Library from iCloud Photos to Google Drive: What Actually Works
Thinking about getting your photos out of iCloud Photos and into Google Drive? This guide walks you through three practical approaches—from manual browser transfers to iPhone uploads and cloud-to-cloud automation—so you can choose the method that fits your setup.
Introduction
At some point, many Apple users decide they want a copy of their iCloud Photos library stored somewhere more flexible—often Google Drive. Maybe it’s for easier sharing, long-term storage, or simply keeping everything in one place. The challenge is that iCloud Photos isn’t designed like a traditional file system, which makes exporting large libraries less obvious than it should be. In this article, we’ll look at three workable ways to move photos from iCloud Photos to Google Drive, each suited to different library sizes and technical comfort levels.
- Method 1: Download from iCloud Photos and Upload to Google Drive (Browser)
- Method 2: Upload Directly from Your iPhone Using the Google Drive App
- Method 3: Transfer Directly in the Cloud with CloudsLinker
- Quick Comparison
- Important Things to Know
- Frequently Asked Questions
- Step-by-Step Video: Transfer iCloud Photos to Google Drive
iCloud Photos keeps your entire photo library synced across iPhone, iPad, and Mac. It’s beautifully integrated into the Apple ecosystem — but storage can become expensive quickly.
- Only 5 GB free shared across backups, photos, and files.
- Paid iCloud+ tiers scale up to 12 TB.
- Optimized storage keeps full-resolution photos in the cloud.
- Tight Apple lock-in — best experience happens inside Apple devices.
Many users love the seamless syncing — until their photo library crosses 200 GB or 500 GB and monthly costs start stacking up.
Google Drive offers flexible cloud storage that works across all platforms — Windows, macOS, Android, iOS, and browsers.
- 15 GB free shared across Google services.
- Google One plans offer competitive pricing for large storage.
- Easy sharing through public or restricted links.
- Works outside Apple ecosystem.
For users who want broader compatibility and often lower long-term cost, Google Drive can feel more flexible than iCloud Photos.
I’ve spoken with several users who originally loved iCloud Photos — until their photo library hit a few hundred gigabytes. At that point, the monthly iCloud+ subscription became noticeably more expensive compared to equivalent Google One plans.
One photographer shared that after upgrading twice in a year, she realized most of her photos were simply archived — rarely opened on Apple devices — but still costing premium storage fees. Moving everything to Google Drive reduced her monthly bill while keeping access from Windows PCs and shared family accounts.
- Cost Efficiency: For large libraries, Google Drive plans are often more price-competitive.
- Cross-Platform Freedom: No dependency on Apple hardware.
- Simpler Sharing: Google Drive links are widely compatible.
- Long-Term Archiving: Useful if you mainly store rather than edit photos.
That said, exporting from iCloud Photos isn’t as straightforward as moving regular folders. Let’s look at two realistic ways to do it.
Method 1: Download from iCloud Photos, Then Upload to Google Drive
This is the simplest method — and the one most people try first.
Log in to iCloud Photos on the web, select your images or albums, download them to your computer, and then upload them into Google Drive.
- Works for small libraries
- No third-party tools required
- Manual control over what gets transferred
The downside? Time. If your library is 300 GB or more, downloading everything locally can take hours — and uploading again doubles the wait. It also uses your local bandwidth twice.
For 5–20 GB, this is fine. For 500 GB, it becomes a weekend project.
Method 2: Upload Directly from Your iPhone Using the Google Drive App
If most of your photos already live on your iPhone, this might be the most straightforward option.
Instead of downloading everything to a computer, you can install Google Drive for iOS , sign in with your Google account, and manually upload selected photos straight from your device.
Here’s how most people do it:
- Download and open the Google Drive app on your iPhone.
- Tap the “+” button and choose Upload.
- Select Photos and Videos.
- Pick the images or albums you want to move.

The upload runs in the background, although it may pause if the app is closed for too long or if iOS limits background activity.
One user told me she preferred this method because she didn’t want to export her entire 600 GB library — she only needed specific family albums moved. For that kind of selective transfer, using the phone directly actually felt more controlled and less overwhelming.
That said, for very large transfers, uploading from a mobile connection can be slower than desktop or cloud-based methods.
Method 3: Move Your iCloud Photos to Google Drive in the Cloud (No Downloads)
Why Some Users Skip the Download Step Entirely
If your photo library is already hundreds of gigabytes, downloading everything to your laptop just to upload it again feels unnecessary. Using CloudsLinker allows the transfer to run directly between iCloud Photos and Google Drive — entirely online.
Step 1: Add iCloud Photos
After signing in, click Add Cloud and select iCloud Photos. Log in with your Apple ID and complete two-factor authentication if required.

Once connected, your albums and photo folders appear inside the dashboard, similar to browsing them on iCloud.com.
Step 2: Connect Google Drive
Next, choose Google Drive from the cloud list. You’ll be redirected to Google’s secure authorization page to approve access.
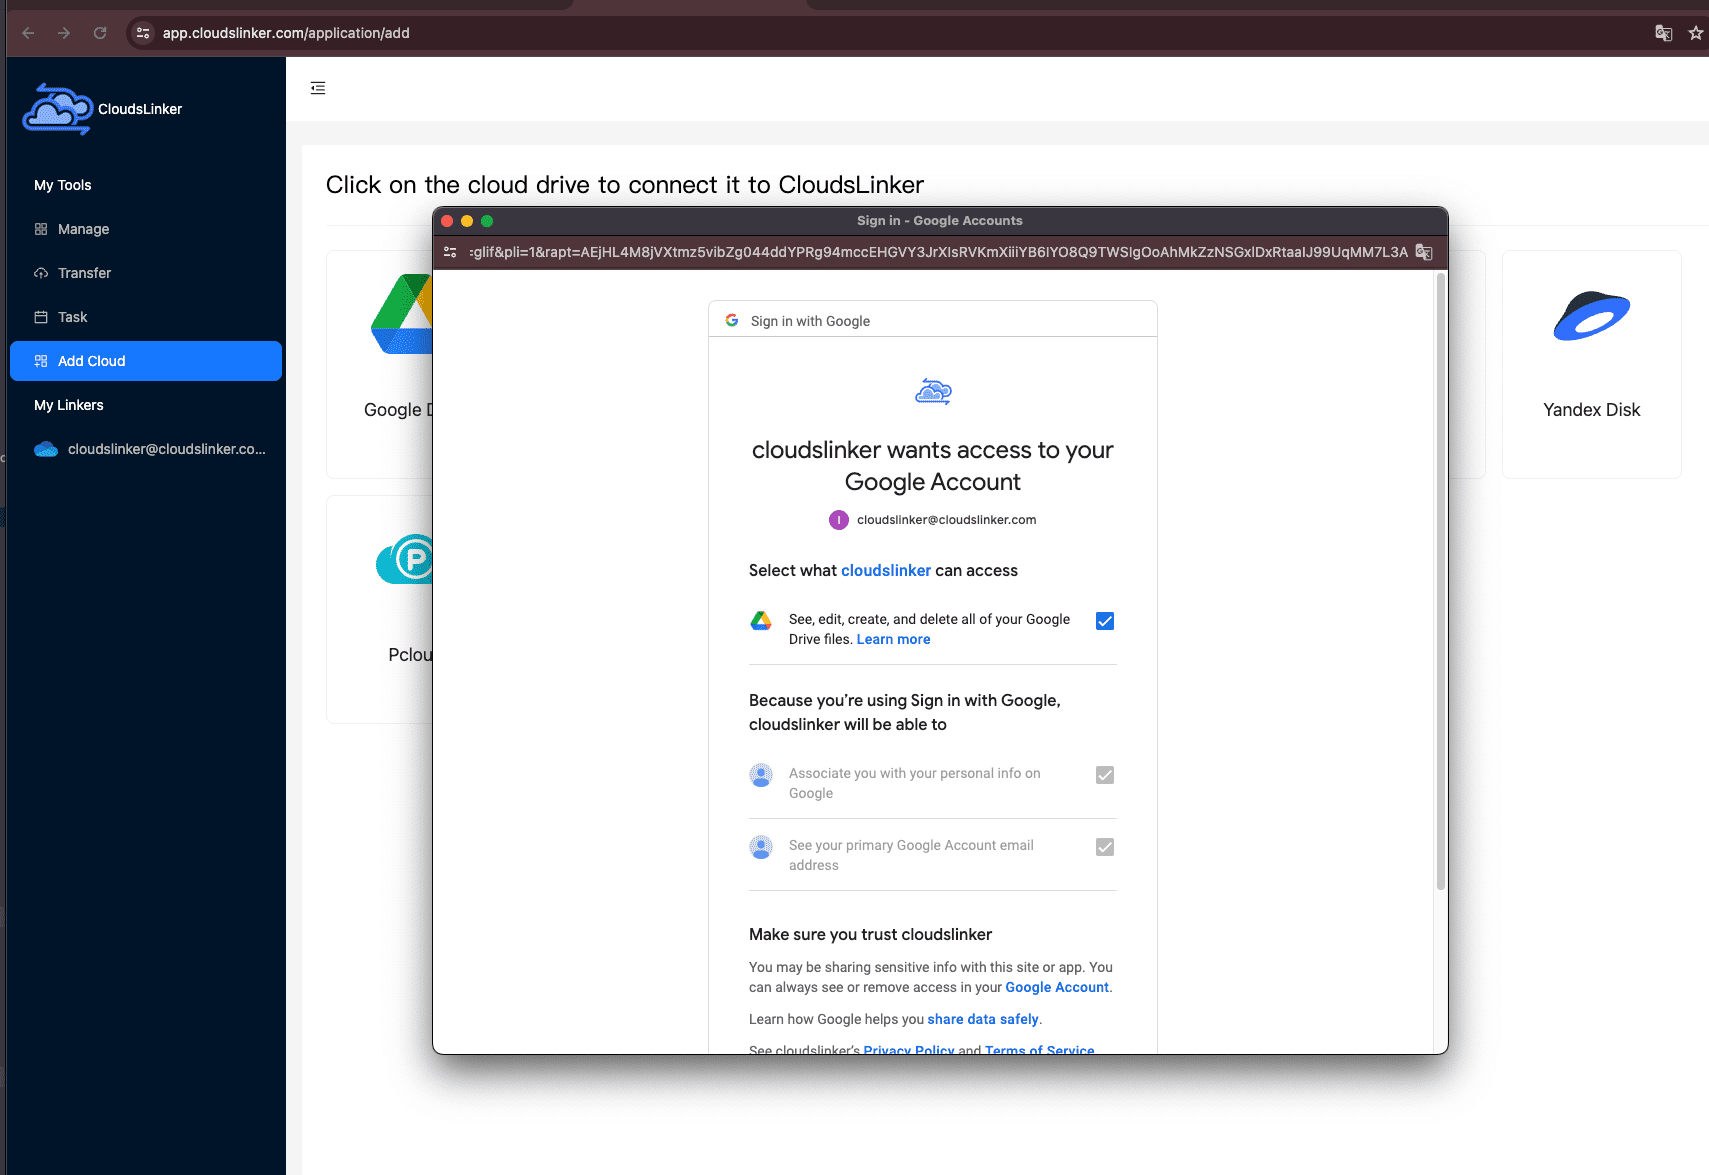
After authorization, Google Drive will show up alongside iCloud Photos as an available destination.
Step 3: Configure and Start the Transfer
Open the Transfer section. Select iCloud Photos as the source and choose Google Drive as the destination.

You can select specific albums instead of moving your entire library. Many users prefer transferring gradually, especially if their collection exceeds several hundred gigabytes.
Step 4: Monitor Progress
The active task will appear in your Task List. You can check real-time progress, pause if needed, and review logs in case any files require attention.
Comparing the 3 Ways to Move Photos from iCloud Photos to Google Drive
There’s no single “best” way to move your iCloud Photos library to Google Drive. It mostly depends on how much you’re moving and whether you want to babysit the process. If you’re trying to cut iCloud storage costs (which can add up fast once you outgrow the free tier), the goal is usually simple: get a reliable copy into Drive without breaking your workflow. Here’s a quick side-by-side view of the three approaches in this guide.
| Method | Ease of Use | Speed | Best For | Uses Local Bandwidth | Skill Level |
|---|---|---|---|---|---|
| Web Browser (Download → Upload) | ★★★★★ | ★★★☆☆ | Small batches, occasional exports | Yes (download + upload) | Beginner |
| iPhone (Google Drive App Upload) | ★★★★★ | ★★☆☆☆ | Uploading specific albums or recent photos | Yes (mobile/Wi-Fi upload) | Beginner |
| CloudsLinker (Cloud-to-Cloud) | ★★★★★ | ★★★★★ | Large libraries, hands-off transfers | No | Beginner |
If you only need to move a few folders’ worth of photos, the browser method is fine. If you’re mostly working from your phone and want to upload just a few albums, the Google Drive iPhone app is surprisingly practical. But once you’re dealing with a big library (hundreds of GB), the manual download-and-upload loop can feel like punishment — that’s where a cloud-to-cloud transfer with CloudsLinker tends to be the least stressful.
iCloud Photos doesn’t behave like a normal “folder of files,” so a little preparation goes a long way. These are the things that most often trip people up when moving photos into Google Drive.
- Don’t transfer single photos one-by-one if you can avoid it: if you’re using iCloud Photos as a source, selecting whole albums (or folders) is usually faster and more reliable than picking individual images.
- Web downloads have selection limits: on iCloud Photos web, Apple limits how many items you can select at once. If you’re exporting a lot, do it in chunks or choose album-by-album.
- Expect “download → upload” to take longer than you think: the browser method uses your local connection twice. If your upload speed is slow, it becomes the bottleneck. That’s a big reason people switch to cloud-to-cloud transfer for large libraries.
- Watch out for HEIC and Live Photos: some users prefer converting HEIC to JPEG for compatibility when sharing outside Apple ecosystems. If you want the most “Apple-like” experience on the other side, keep originals; if you want broad compatibility, consider converting later (not during the transfer).
- Make sure Google storage has room: Google storage is shared across Drive, Gmail, and Photos. If your account is near full, uploads can fail partway through.
- If cost is your motivation, move in stages: many people don’t need to migrate everything at once. Start with older albums you rarely edit, confirm they’re safely in Drive, then decide what to move next. It’s an easy way to reduce iCloud usage without risking your entire library in one go.
- Use official logins: avoid tools that ask for raw passwords. OAuth-style sign-ins and app-based authorizations are safer, and you can revoke access later if needed.
The biggest “smooth transfer” hack is boring but true: move in batches, verify a few albums, and only then scale up. That’s how you avoid the classic “I moved everything… and now I can’t find half of it” panic.
Frequently Asked Questions
Step-by-Step Video: Transfer iCloud Photos to Google Drive
If you prefer learning visually, this video walks you through how to move your photos from iCloud Photos to Google Drive. You’ll see how to connect both cloud accounts, configure the transfer, choose albums for better performance, and complete the entire migration without downloading anything to your local device. It’s simple, efficient, and ideal for backing up or reorganizing your photo library.
Conclusion
Transferring photos from iCloud Photos to Google Drive isn’t difficult—but the right approach depends on how large your library is and how hands-on you want to be. Smaller collections can be handled manually, selective uploads work well from an iPhone, and cloud-to-cloud transfers remove most of the waiting and re-uploading. Pick the method that matches your situation, and always verify your files once they arrive in Google Drive.
Online Storage Services Supported by CloudsLinker
Transfer data between over 48 cloud services with CloudsLinker

OneDrive

Google Drive

Google Photos

Shared Drive

OneDrive for Business

Dropbox

Box

Mega

pCloud

Yandex

ProtonDrive

AWS

GCS

iDrive

Storj

DigitalOcean

Wasabi

1fichier

PikPak

TeleBox

OpenDrive

Backblaze B2

Fastmail file

SharePoint

Nextcloud

ownCloud

Premiumize me

HiDrive

Put.io

Sugar Sync

Jottacloud

Seafile

Ftp

SFtp

NAS

WebDav

4shared

Icedrive

Cloudflare R2

Scaleway

Doi

iCloud Drive

iCloud Photos

FileLU

Zoho WorkDrive

Telia Cloud / Sky

Drime

Filen
Didn' t find your cloud service? Be free to contact: [email protected]
Further Reading
Effortless FTP connect to google drive: Transfer Files in 3 Easy Ways
Learn More >
Google Photos to OneDrive: 3 Innovative Transfer Strategies
Learn More >
Google Photos to Proton Drive: 3 Effective Transfer Techniques
Learn More >