Drime to iCloud Drive: Bring Files Into the Apple Ecosystem
Transfer Drime files to iCloud Drive for native Finder, Files app and Apple device sync. Browser download or cloud-to-cloud transfer through CloudsLinker.
Introduction
iCloud Drive earns its keep on Apple hardware: files appear natively in Finder and the Files app, sync across iPhone, iPad and Mac without a separate client, and integrate with Apple apps. Drime is a capable private store, but for someone living mostly inside the Apple ecosystem, keeping working files in iCloud removes the step of opening a browser to reach them. Moving the active set into iCloud Drive puts files where macOS and iOS expect them. Drime connects through a developer token; iCloud Drive connects with an Apple ID and two-factor authentication. This guide covers two paths — a manual browser download and upload, and a cloud-to-cloud transfer through CloudsLinker.
Drime is a French cloud storage workspace with end-to-end encryption and GDPR-aligned hosting. It connects to transfer tools through a developer token.
- French data residency: servers in France under GDPR.
- End-to-end encryption: on stored files and shared links.
- Sharing: password-protected, expiring links.
- Cross-platform: web, desktop, mobile — not Apple-specific.
- Third-party access: developer token from Settings → Developer.
iCloud Drive is Apple's cloud storage, integrated with macOS, iOS and iPadOS. It syncs documents and Desktop/Documents folders across Apple devices, with iCloud+ tiers up to 12 TB.
- Apple integration: native in Finder, Files app and Apple apps.
- Free tier: 5 GB shared with Photos, Mail, backups.
- Device sync: automatic across Mac, iPhone, iPad.
- Cross-platform: iCloud for Windows; web at iCloud.com.
- Access: Apple ID + two-factor authentication for transfer tools.
Drime is a platform-agnostic encrypted store; iCloud Drive is an Apple-ecosystem service. The migration trades end-to-end encryption and EU residency for native Apple device integration.
| Feature | Drime | iCloud Drive |
|---|---|---|
| Primary strength | Private encrypted storage | Apple device integration |
| Data residency | France, GDPR | Global Apple infrastructure |
| Encryption | End-to-end | Server-side; E2E with Advanced Data Protection |
| Free tier | Limited free tier | 5 GB shared |
| Third-party access | Developer token | Apple ID + 2FA |
On the Drime side
- Pick the Apple-bound set: move what you want available natively on your Apple devices; leave private archives in Drime.
- Generate a developer token: Drime → avatar → Settings → Developer → Create Token.
- Note shared links — they break once files are removed.
On the iCloud side
- Confirm iCloud+ storage: the free tier is only 5 GB, shared with Photos, Mail and backups. Upgrade if needed.
- Enable Access iCloud Data on the Web: Apple ID → Sign-In & Security. CloudsLinker's iCloud connection needs this on.
- Plan a destination folder such as
/Drime-Import/.
Method 1: Browser Download from Drime and Upload to iCloud Drive
Step 1: Download from Drime
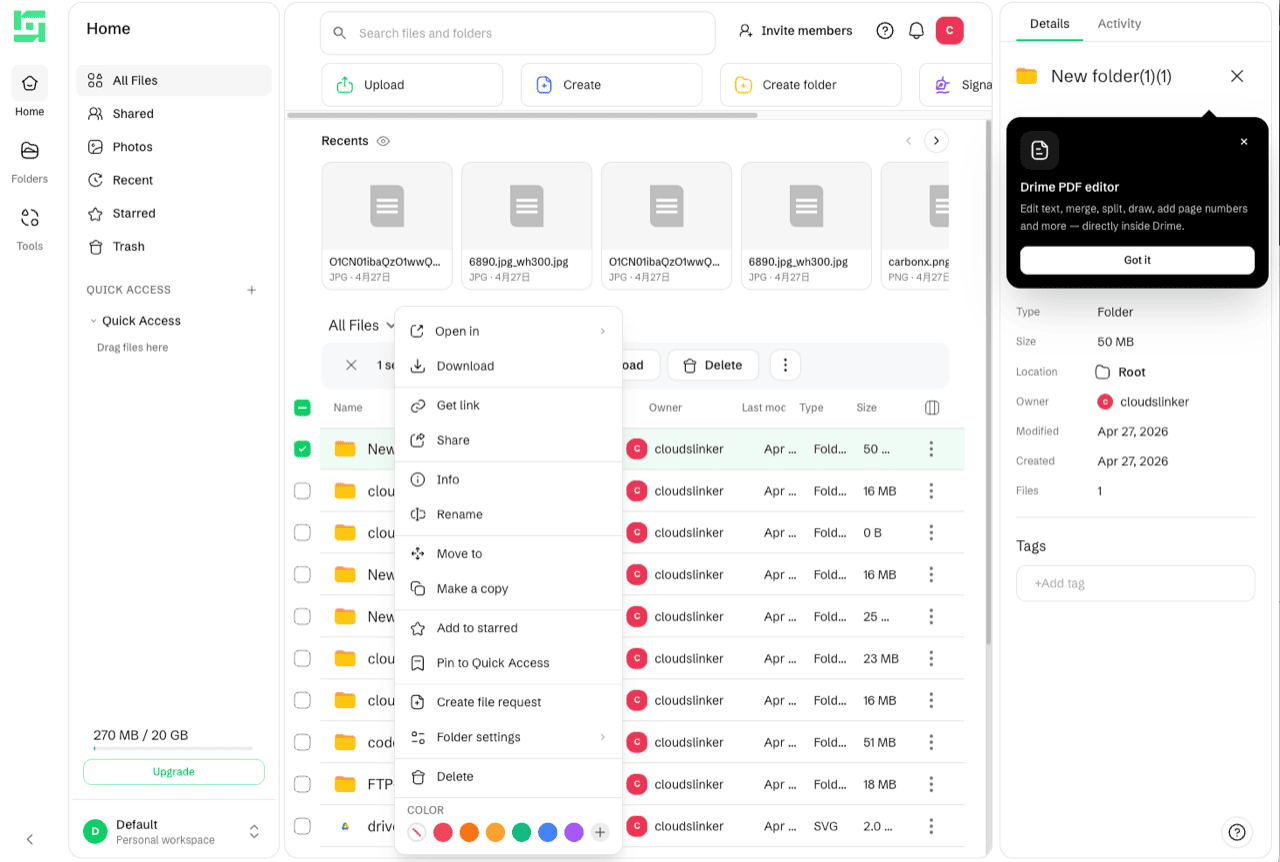
Open the Drime web dashboard, sign in, and download the files or folders you want. Drime packages folders as ZIP archives. Work folder by folder for large libraries.
Step 2: Upload to iCloud Drive
On a Mac, extract the ZIP and drag the folders into iCloud Drive in Finder — they sync automatically. On other platforms, open iCloud.com/iclouddrive and upload through the web. iCloud syncs the files to all your Apple devices.
Method 2: Cloud-to-Cloud Transfer with CloudsLinker
Move Drime to iCloud Drive Without Local Downloads
CloudsLinker connects Drime through its developer token and iCloud Drive through your Apple ID with two-factor authentication, then transfers server-side.
Step 1: Connect Drime
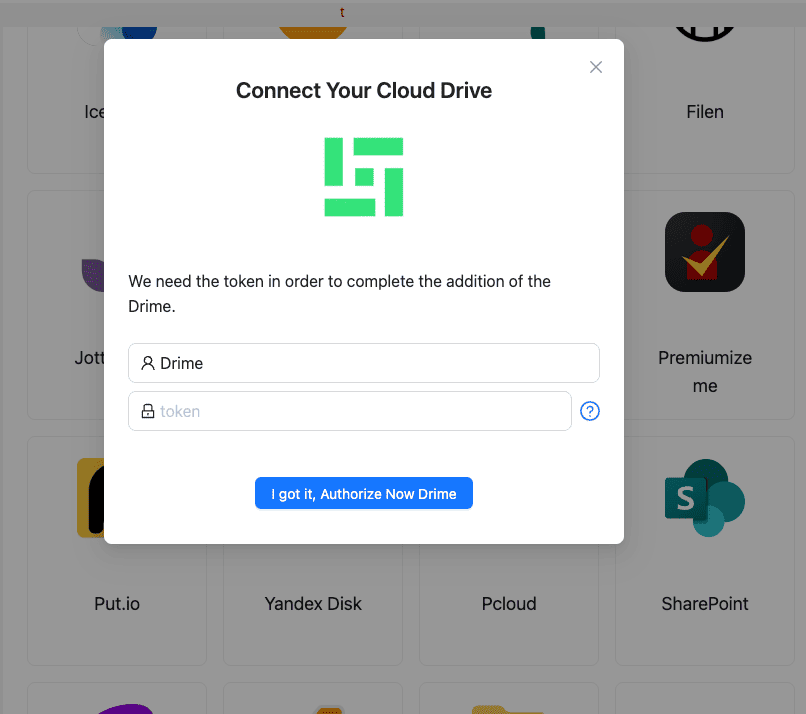
In CloudsLinker, click Add Cloud and select Drime. Paste the developer token from Drime → Settings → Developer. Confirm.
Step 2: Connect iCloud Drive
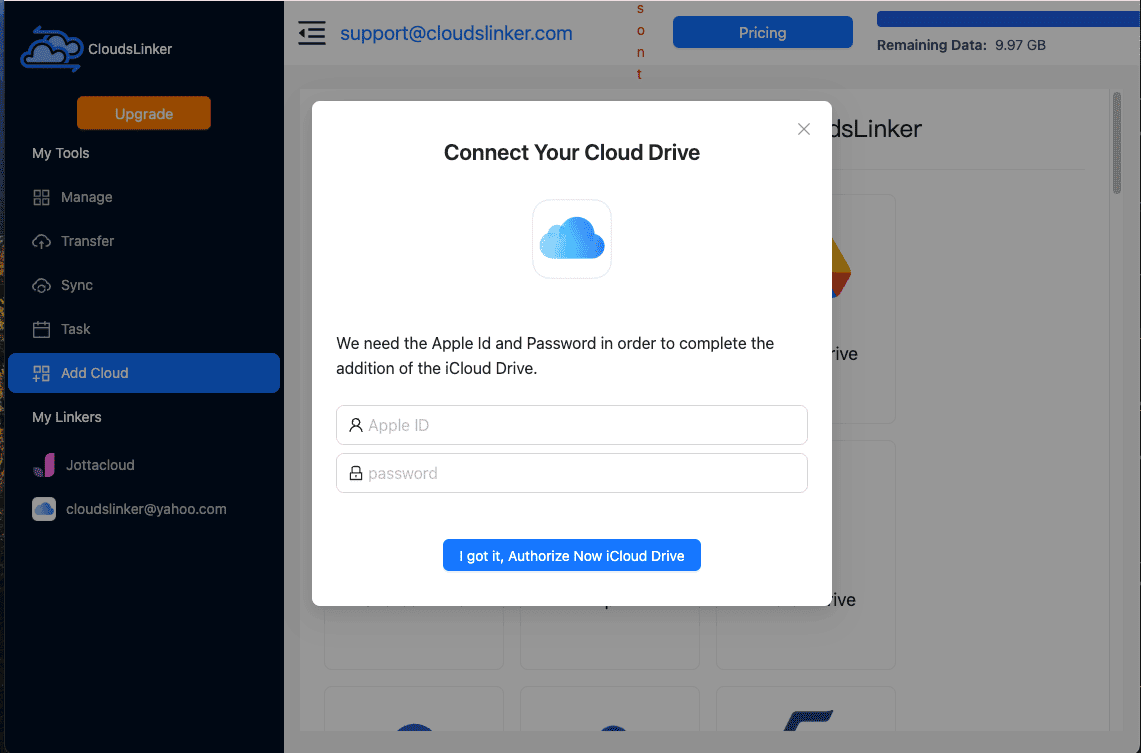
Click Add Cloud and select iCloud Drive. Enter your Apple ID and password, then the 6-digit verification code from a trusted Apple device. Make sure Access iCloud Data on the Web is enabled in Apple Account settings.
Step 3: Configure the Transfer
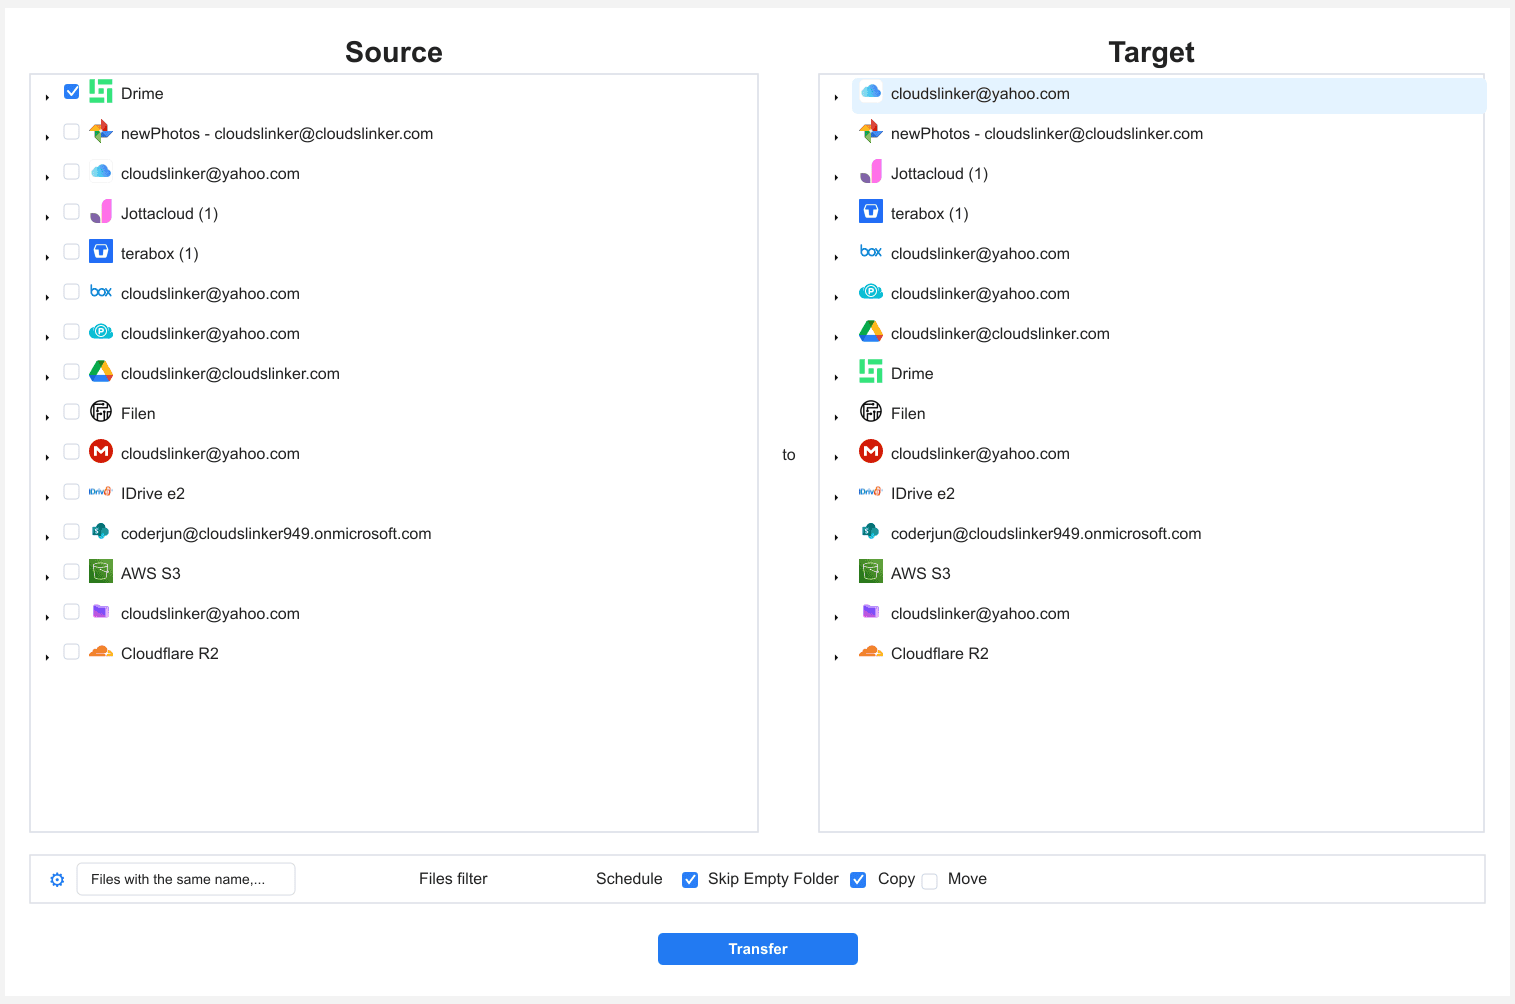
Open the Transfer section. Select Drime as the source and browse your folders. Select iCloud Drive as the destination and choose the target folder. Filter by file type, size or date if needed. Use Copy to keep the Drime originals.
Step 4: Start and Monitor
Click start. The Task List shows transferred size and remaining items. The transfer runs on CloudsLinker servers even if you close the browser. After it finishes, the files sync to your Apple devices — verify a sample before clearing Drime.
Method Comparison
| Method | Ease of Use | Speed | Best For | Uses Local Bandwidth | Skill Level |
|---|---|---|---|---|---|
| Browser Download + Upload | ★★★★☆ | ★★☆☆☆ | Mac users, a few folders | Yes | Beginner |
| CloudsLinker | ★★★★★ | ★★★★★ | Larger sets, Windows users, hands-off moves | No | Beginner |
- Confirm iCloud+ space first: the 5 GB free tier fills fast. Upgrade to an iCloud+ plan that covers the Drime volume before starting.
- Enable web data access: CloudsLinker needs Access iCloud Data on the Web turned on. If the connection fails, this is usually why.
- Consider Advanced Data Protection: to keep end-to-end encryption like Drime's, enable ADP in your Apple ID settings so iCloud Drive is E2E rather than server-side encrypted.
- Recreate share links: Drime links do not migrate. Use iCloud sharing for anything that was shared.
- Rotate the Drime token afterward: delete or regenerate it once the migration is verified.
- Let sync settle: after the transfer, give iCloud time to sync to all devices before deleting anything in Drime.
Frequently Asked Questions
Conclusion
For a few files, downloading from Drime and dropping them into iCloud Drive via Finder or iCloud.com is quick. For a larger set, CloudsLinker connects Drime through its developer token and iCloud Drive through your Apple ID with two-factor authentication, moving everything server-side. Make sure Access iCloud Data on the Web is enabled before connecting, keep the Drime copy until iCloud is verified, and note that iCloud's free tier is only 5 GB — confirm you have iCloud+ space for the volume.
Online Storage Services Supported by CloudsLinker
Transfer data between over 58 cloud services with CloudsLinker

OneDrive

Google Drive

Google Photos

Shared Drive

OneDrive for Business

Dropbox

Box

Mega

pCloud

Yandex

ProtonDrive

AWS

GCS

iDrive

Storj

DigitalOcean

Wasabi

1fichier

PikPak

TeleBox

OpenDrive

Backblaze B2

Fastmail file

SharePoint

Nextcloud

ownCloud

Premiumize me

HiDrive

Put.io

Sugar Sync

Jottacloud

Seafile

Ftp

SFtp

NAS

WebDav

4shared

Icedrive

Cloudflare R2

Scaleway

Hetzner Object Storage

Synology C2 Object Storage

S3 Compatible

Doi

iCloud Drive
iCloud Photos

FileLU

Zoho WorkDrive

Telia Cloud / Sky

Drime

Filen

TeraBox

Internxt

Degoo

Gofile

Pixeldrain

Shade

Koofr
Didn' t find your cloud service? Be free to contact: [email protected]
Further Reading
Effortless FTP connect to google drive: Transfer Files in 3 Easy Ways
Learn More >
Google Photos to OneDrive: 3 Innovative Transfer Strategies
Learn More >
Google Photos to Proton Drive: 3 Effective Transfer Techniques
Learn More >